


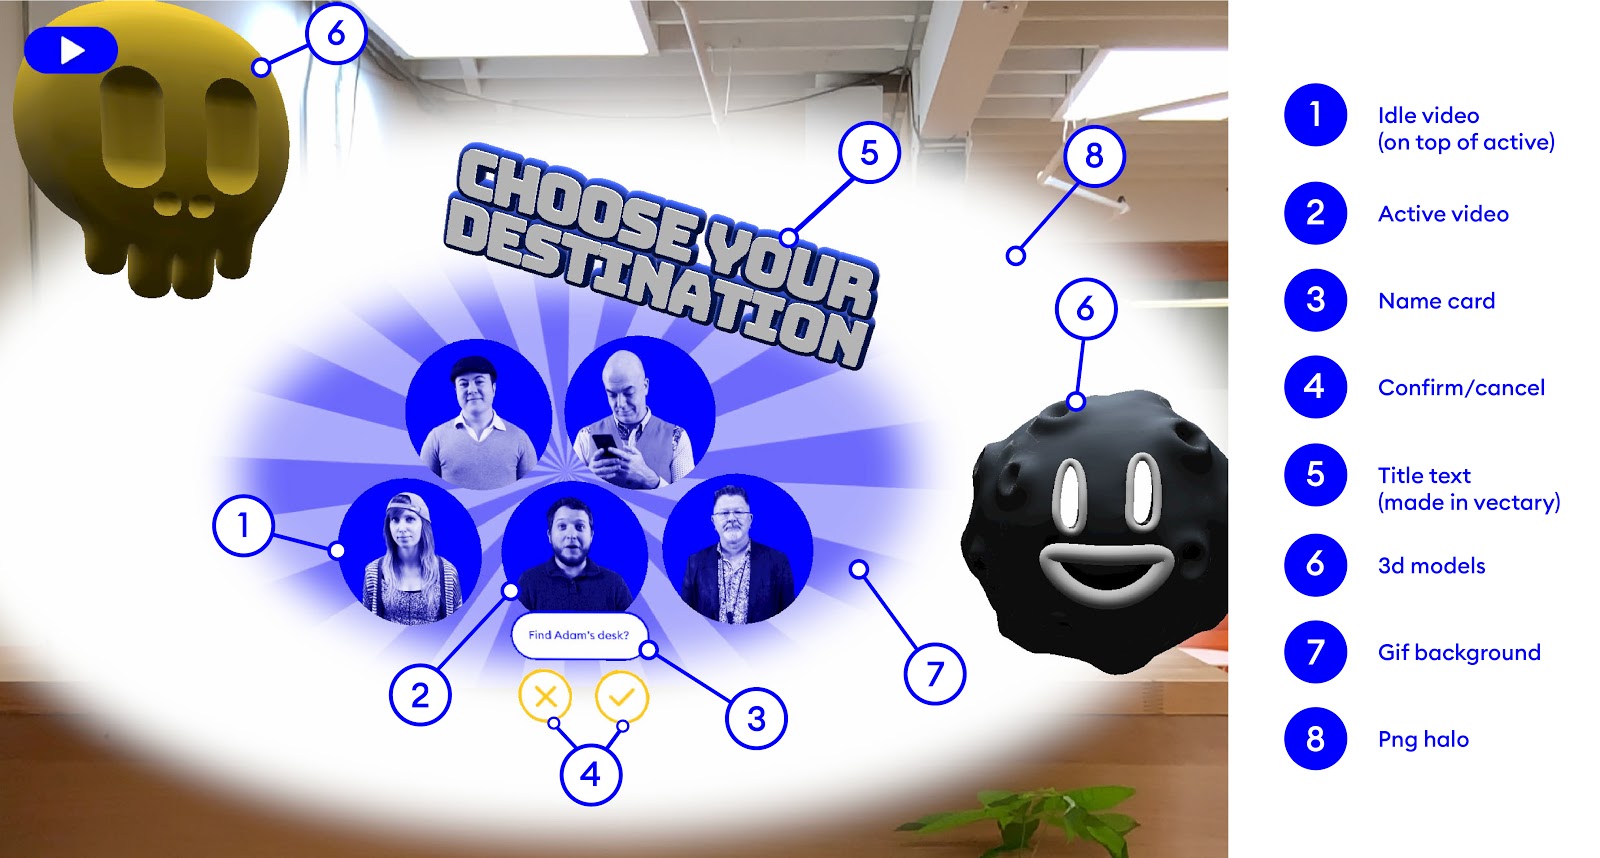
Build your own AR directory experience
Your response to our augmented reality wayfinding concept was amazing–we loved seeing how you customized it to fit your spaces. If we captured your imagination, read on. Today I'll show you, step-by-step, how to build a helpful and engaging experience using nothing but those same transparent videos, some GIFs, and a few 3D models.
Ingredients you'll need:
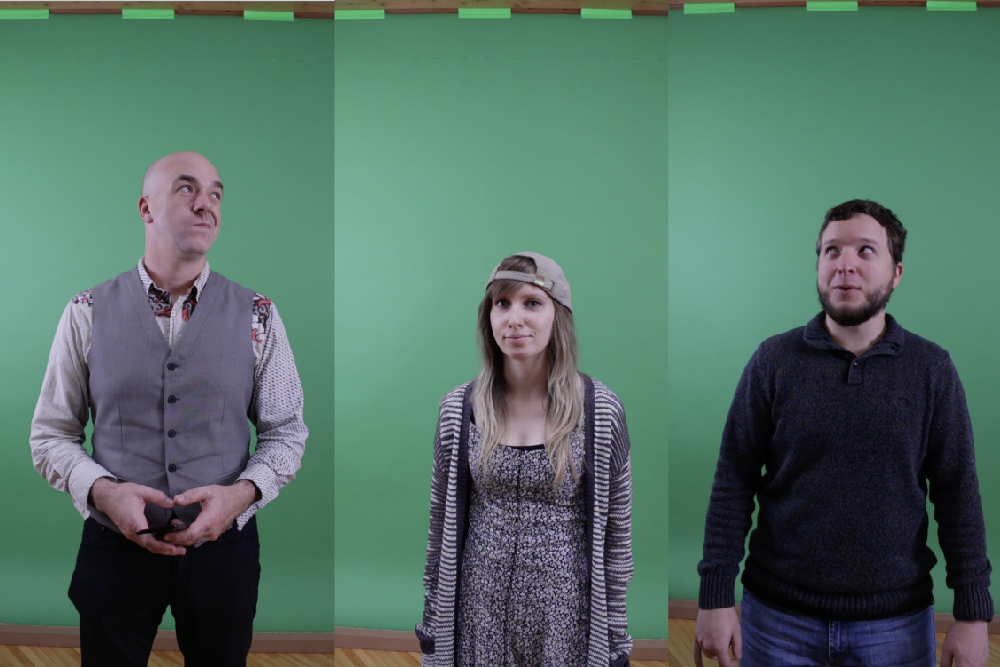
- Two transparent videos for each employee (an avatar clip without sound & a longer invitation to "find my desk")
- Text cards with everyone’s names
- A "Confirm" button
- A "Cancel" button
- Background image (we used a striped GIF)
- Halo (PNG)
- “Choose your destination” title text (made with Vectary)
- 3D models to add a little interest (optional)
Time to build: One to two hours.
What is transparent video?
If you need a refresher, you can review this post where I showed you how to make transparent video with After Effects.
You'll also want to make sure you download Torch AR.
Why transparent video?
We’ve found transparent video, while it requires a little extra work, is useful when building augmented reality experiences. Regular, non-transparent video is always rectangular. Transparent video meshes better with the real world–which is filled with natural and organic shapes. How many squares that occur in nature you can think of?
And since you are designing augmented reality experiences meant to interact with and overlay the camera’s view of a real world full of organic shapes and irregular edges, having a video with a more organic shape will fit in more with the world around you.

Using GIFs & animations
Designers of screen-based mobile apps know it is not easy to direct user attention to a specific task or interaction, even under the best of conditions. Immersive app experiences, which allow the user to explore physical and digital space in a far less constrained manner, greatly complicates this task. We used GIFs and animations to grab the user’s attention and draw focus to a specific point in the experience.
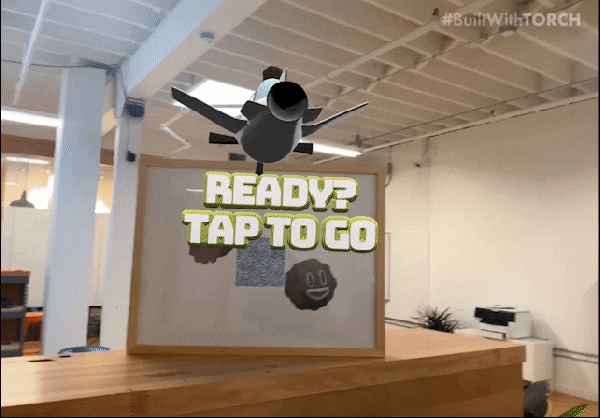
But don’t overload the scene with a bunch of movement and color changes. There’s still room for subtlety. Designing for attention is all about the contrast of a design choice with the prevailing environment. If you have a bunch of circles and only one is moving, your eyes move to that one. Especially when you’re in an environment where you are looking for clues to understand your experience, you can use GIFs, animations, and movement - often triggered by gaze and proximity - to guide your user without overwhelming them.
Interactivity equals a memorable AR experience
Interactions give the user a sense of control and ownership over the experience, which in turn contributes to making a lasting memory. The principal is similar to the idea that writing something down will make you more likely to remember it. When a user interacts with your design, they are drawn in. Their choices have consequences and, at some level, they understand they have a role in creating the AR experience.
The Directory Board: Step by step
Once you have created the assets, you can build the directory board in three easy steps. 1) Arrange the video assets. 2) Arrange the background and button assets relative to those video assets. 3) Add the interactions.
Step One: Arranging video avatars
Each person’s video actually consists of two separate video assets - the avatar or “top” layer on a short loop of each individual (without sound) that plays continuously and the longer loop with sound (“Hi, I’m Adam. Follow me to my desk.”) that will play when the avatar is selected.
We want these avatars lined up evenly in space and displayed as a cohesive group.
With a little planning, you can set this up in no time. All the videos are on the same plane in the scene and therefore share the same Z coordinate. Each row of videos shares the same Y coordinate. All you really need to do is arrange each video on the X axis.
- Use “Object Properties--->Position” inputs to arrange objects - While freeform manipulation using multitouch gestures is the most common way to arrange objects in Torch when you are roughing in a layout, editing the X, Y, and Z values of objects in Object Properties---> Position is a better way to arrange items with uniform precision.
Set the Z and Y coordinates:
- Select all the avatars (make sure Multi-select is on), tap Object Properties-->Position→ and enter the Z coordinate.
- Select all three avatars on the bottom line and assign them the same Y coordinate.
- Repeat with the top two avatars.
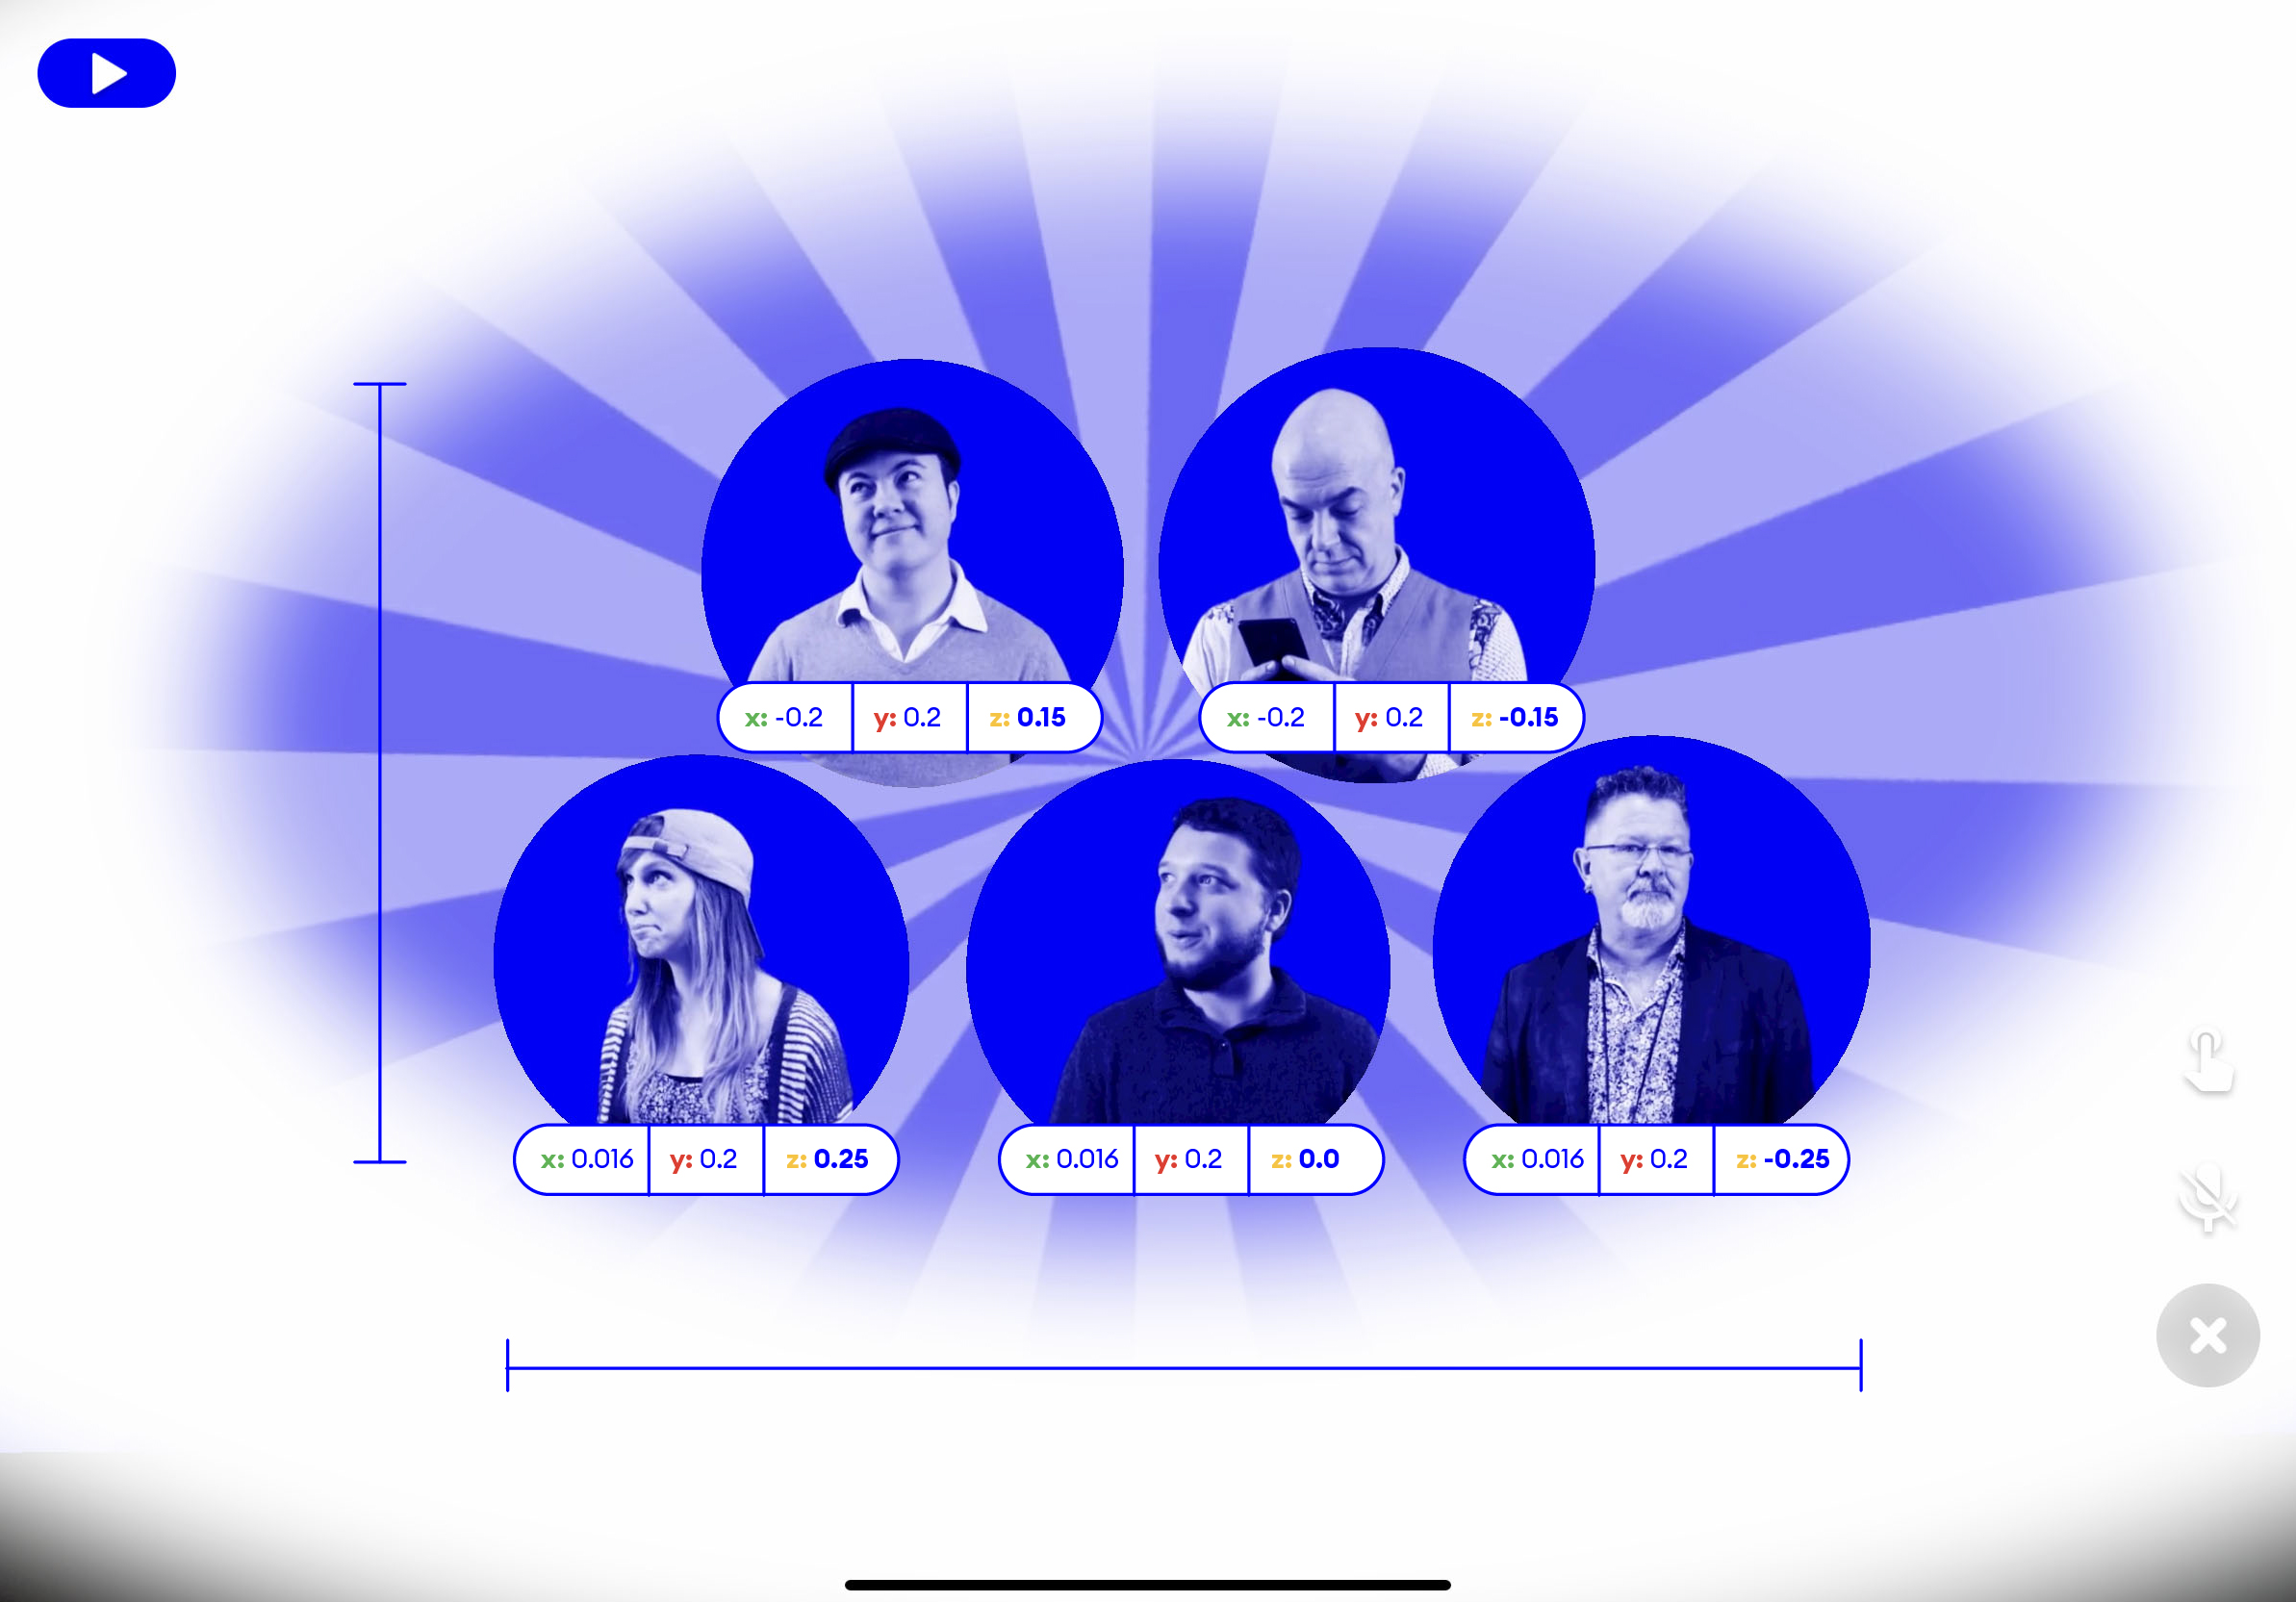
- Distribute objects on the X axes - The only even slightly complicated part of this part of the design is figuring out an even distance to put between the center of each avatar object and then calculating the X coordinates for all five.
- Tip: Position is calculated from the center of the object so make sure and allow for the object size in determining spacing.
Arranging the avatar to overlay the video
- In order to achieve the effect of tapping the avatar video for a person and having the sound video play, both the avatar and sound videos need to be the exact same size and share a location in space. Luckily, this is simple. Just edit their positions to be identical to their corresponding avatars.
- Note: when visible, videos currently loop continuously, including the sound. Setting a video to invisible and then toggling it’s visibility setting is the only way to control playback in Torch AR for now.
- Set the sound video’s Object Property to invisible.
- Tip: It can be difficult to select objects of the same size when they occupy the same space. To get around this currently, I like to have the rotation slightly off on one of the objects until everything is finished and I am satisfied with the design. This allows me to select either avatar without having to move around a great deal.
Add background and 3D text
The background is built with two images that also share the same coordinates to make them appear like a single object.
- The first object is the slow moving GIF with a subtle pattern.
- The second object is a PNG that looks like a fuzzy white halo. Added together, you get a slow moving background with a fuzzy border.
- To position the objects, rough in the location of the background GIF relative to the avatars first using freeform manipulations. Make subtle adjustments by modifying the Position property.
- After you have the GIF where you want it, add the fuzzy white halo and enter the same values for X, Y, and Z position.
- I created the text using Vectary. I placed it above our avatars in a spot that doesn’t fight them for attention, but still feels part of the piece. (We will cover the animations in the next post.)
That’s it. We are almost done.
Add the text card & cancel/confirm buttons
The text cards and buttons are PNGs made in Adobe Illustrator. A card was made for each person, but the confirm and cancel buttons were easily reused.
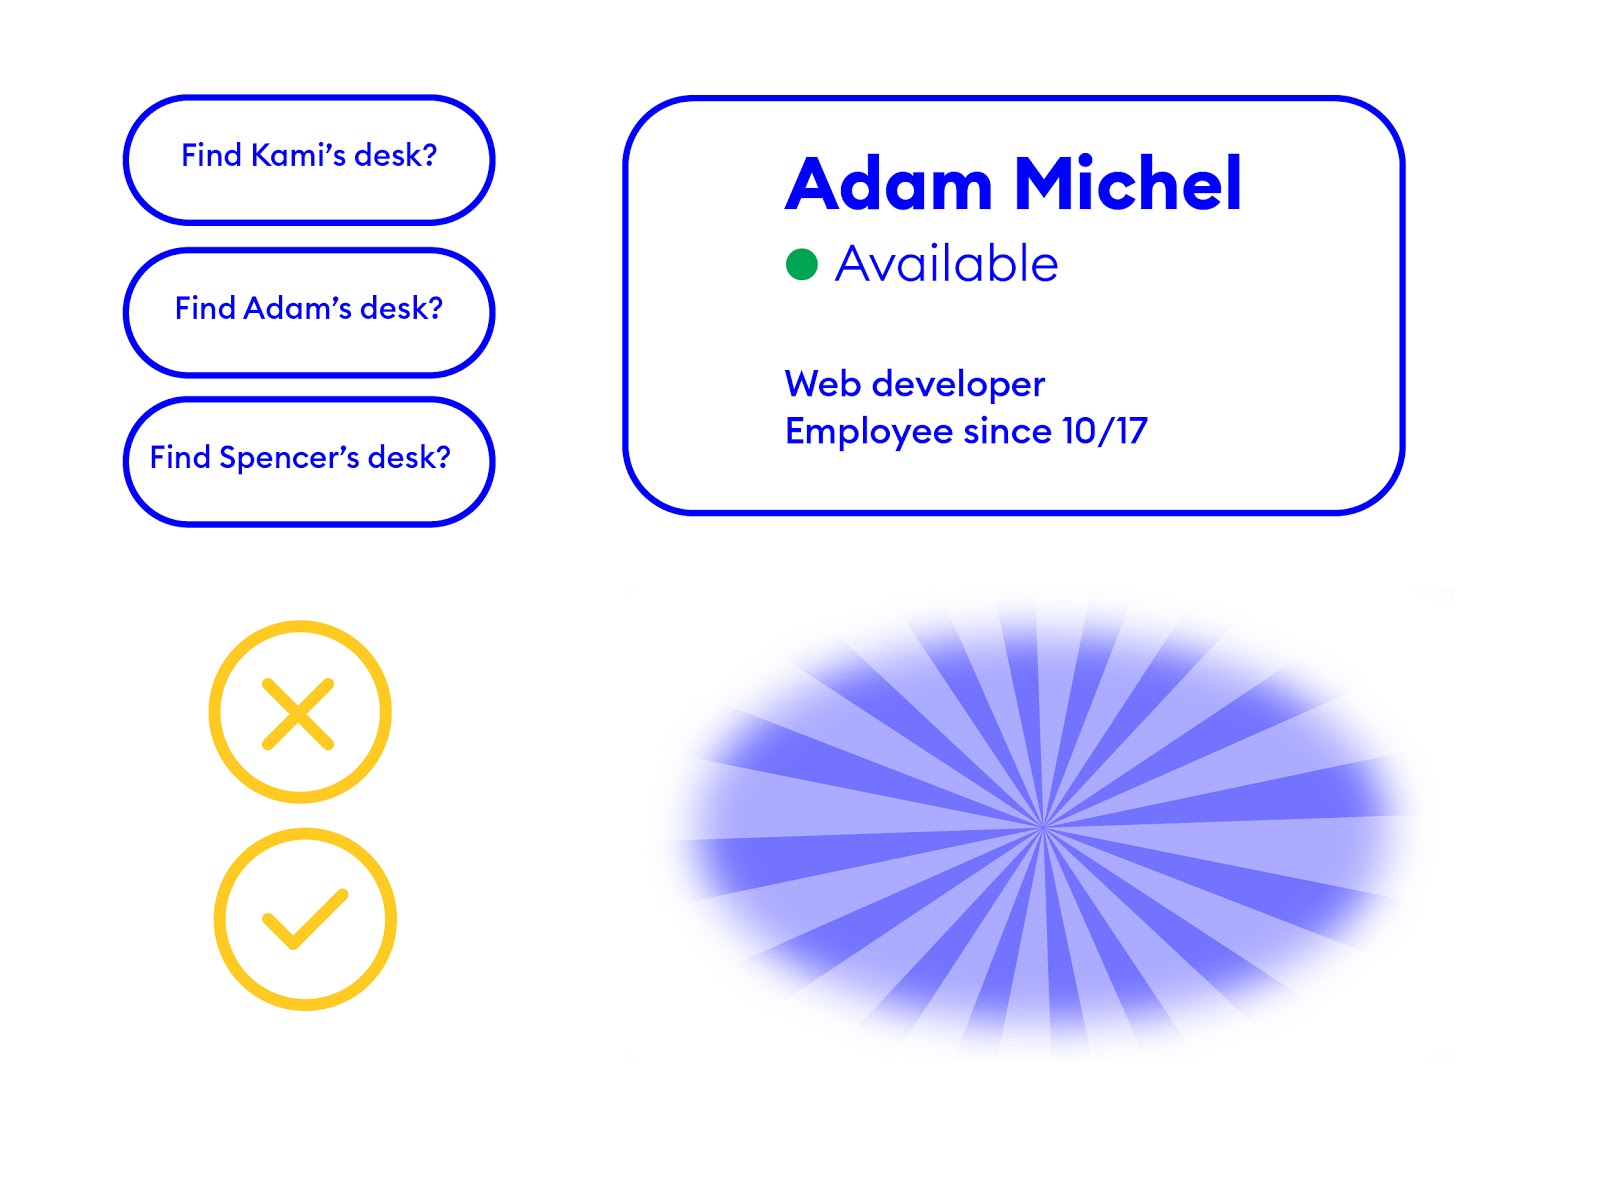
The text cards go in front of the avatars like a badge and help lock in the focus being on the sound video.
I placed the Confirm and Cancel buttons under the text cards and lined them up on the same Z and Y planes.
TIP: You can make the text card/button set for one person and then duplicate all pieces, move them into position over the other avatars and then used the new asset replace function to replace the respective text cards.
Since the text cards and confirm/cancel buttons don’t appear until you tap on the avatar associated with each person, set them to Invisible in Object Properties.
Creating the interactions
Adding interactions is what really brings the directory to life. I will address the animations that cause the directory to seem to emerge from the poster in my next blog post. In this post I will only cover the interactions directly involved with selecting a desk to visit. They are:
- Tap an avatar to reveal the sound video, text card, and cancel/confirm buttons;
- Tap the cancel button to choose another avatar.
- Tap the confirm button to start wayfinding experience.
Interaction #1: Tap the avatar to choose a person.
Using the Select trigger, create an interaction that causes a person’s avatar to become invisible when it is tapped and in its place a sound video becomes visible (and starts playing) along with the text card and buttons.

For each video avatar, create an interaction with a “select” trigger that:
- Turns the corresponding sound video, text card, anc cancel/confirm UIs from invisible to visible.
- Changes the avatar to invisible so there is only one video playing.
Interaction #2: Tap the cancel button.
Assign a Select Object trigger to the button that sets the avatar to visible and the sound video, the text card, and the buttons to invisible.
Interaction #3: Tap the confirm button.
This button is the key to reaching the next part in the experience. When the visitor taps the confirm button, the interaction should reduce the size of all currently visible elements dramatically and set them to invisible. This is where elements from the next part of the journey appear, but we will go into more details on those in the next blog.
And presto! That's it. You've built your first interactive directory. Use this for everything from wayfinding to interactive kiosks to product choosers.
Up next, I will show you how to design all the animations that give the wayfinding app it's flair


