Experience designers love Figma because the web-based tool allows them to build assets and interactive prototypes in the same space – empowering them to test and quickly iterate on their UX prototypes. Figma’s robust flexibility becomes even more valuable when designers incorporate augmented reality (AR) features into their app designs.
With Figma and Torch AR you can transform a rough idea into a working mobile AR prototype that combines 2D designs and immersive interactions. Simple, straightforward, and fast. With Torch, designers can still use their favorite tools and familiar workflows to create 3D apps and experiences in the same way they create mobile and web apps. In this post we’ll show you how to add AR functionality in an instructional how-to app built in Figma.
.gif)
Start with a problem
At Torch HQ we have a coffee maker that has more features and buttons than most cars. When I started at Torch I couldn’t figure out how to use it and I wasn’t the only one. Our friends at Komodo Digital have shown that augmented reality is ideal for help content. So today, I am going to build an interactive instruction manual to show you how you can build an AR powered experience using GIFs, video, and interactions in a Figma prototype. (Video is available today. GIFs will be available in the next release, due out soon.)
Let’s start by mapping out the mobile app and our key AR features. Since this is a prototype, we are going to keep it simple. A user opens the app, navigates to a particular appliance (our coffee maker in this case), and views the augmented reality user instructions. While this is a simple app, don’t underestimate how augmented reality can improve the user’s experience.
Step One: Build the Screens in Figma
Figma is web based and free, so to get started you’ll need to set up an account.
Choose your basic layout. We’ll build this app in landscape. I chose the 1175 x 705px aspect ratio, but feel free to choose accurate frame presets for the different devices and environments you are building for. In this case, a horizontal layout takes best advantage of the video elements we’re looking to incorporate.
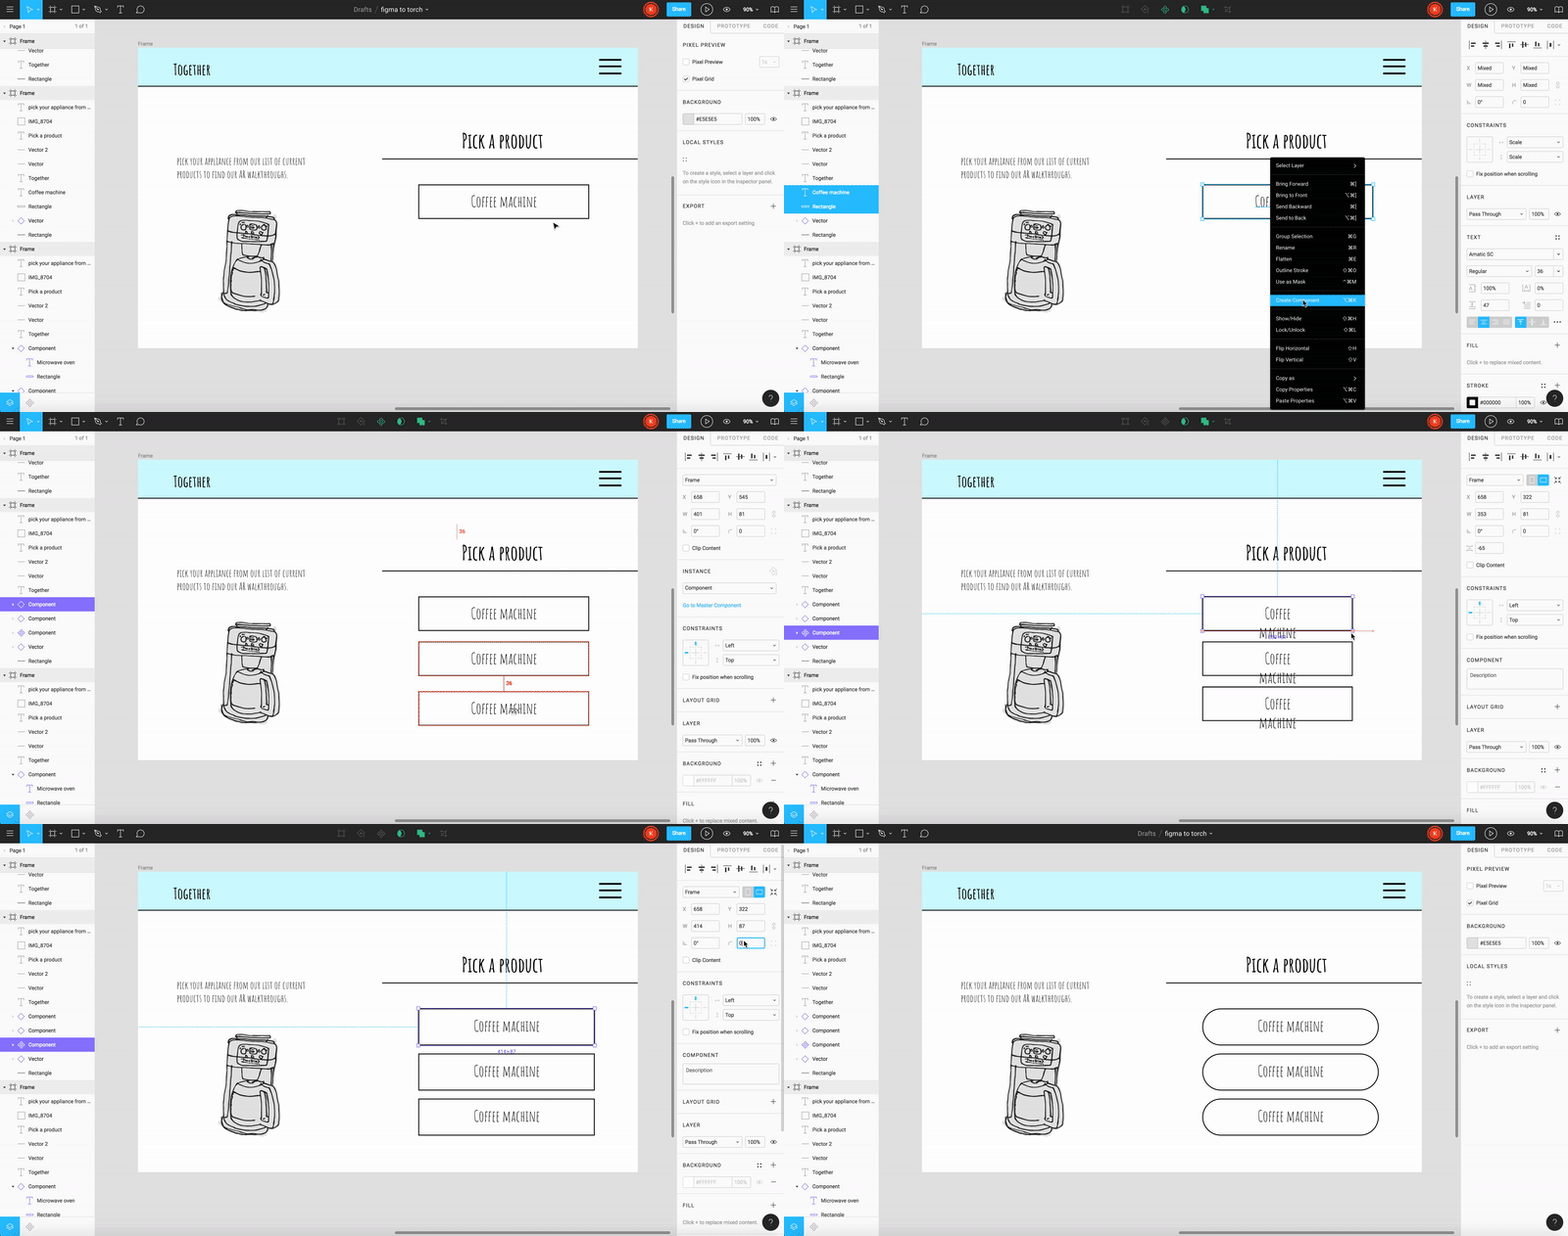
Use components to quickly build and style your experience. Since this instructional app is comprised of lists of tasks, we can create one list item as a component and then replicate additional elements from that component. This allows us to make all edits on the “control component” and see those edits on the other instances of the element. Using components really sped up this otherwise tedious part of the design process. Yay Figma!
Build the 2D app experience within Figma. Now that you have the elements developed, just open the prototype menu, on the right, and create the interaction flow. Select the item users will tap to move forward in your app prototype. Once you select an object, use the action drop down, again on the right panel, and select the frame you want to move to as a result of tapping/clicking. Pretty straightforward. First build out all of your 2D interactions, then let’s add AR!

Step Two: Structure the 3D experience in Torch
Torch is a free iOS mobile app, so to get started you’ll need to download the app and set up an account.
Plan your video assets and import them into Torch. First, map out and create the video assets and animations you’ll need for your experience. Torch supports video, GIF, and sound files. I built both a GIF and video elements for this example prototype. I used Illustrator to create the GIF images and used the built-in camera on my iPad to record the video. Additionally, I did some pre-production tweeks with After Effects. Once I was satisfied with the video content, I used AirDrop to send the final files to my tablet’s camera roll. You can drag the video elements into your Torch project by opening your assets drawer.
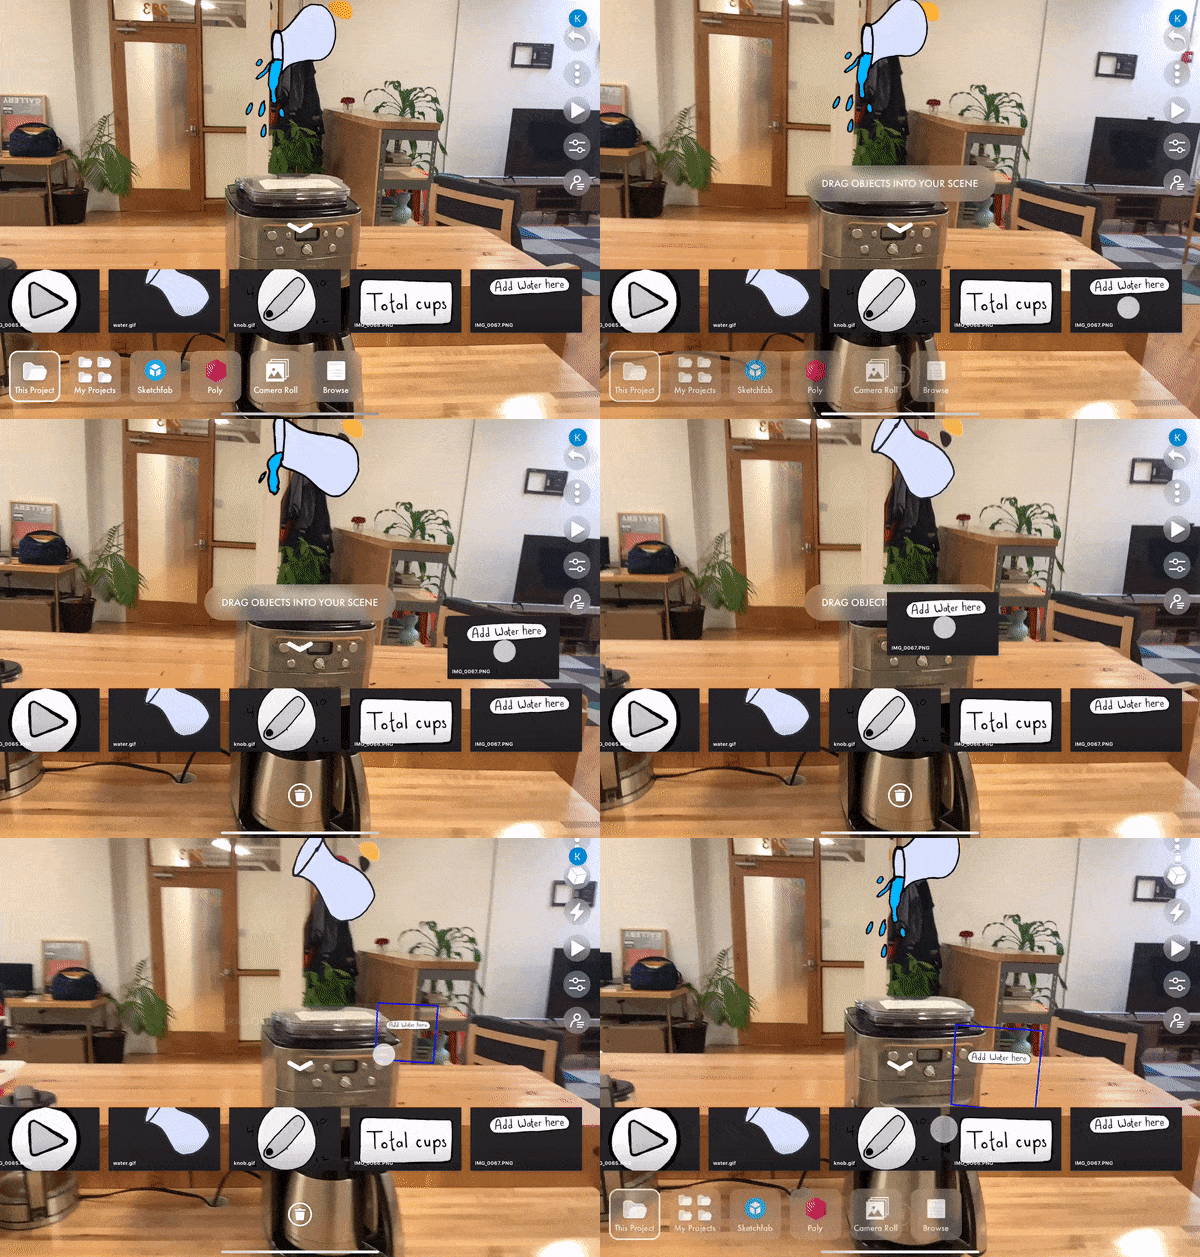
Build Torch scenes for each instructional step. In Torch, scenes allow you to build powerful immersive prototypes and storyboards with complex information architectures. For this app, we’ll use scenes to organize our interactions and guide the user’s progress through the process. I recorded a scene for adding beans, a scene for adding water, and a scene that instructs how to read the water gauge.
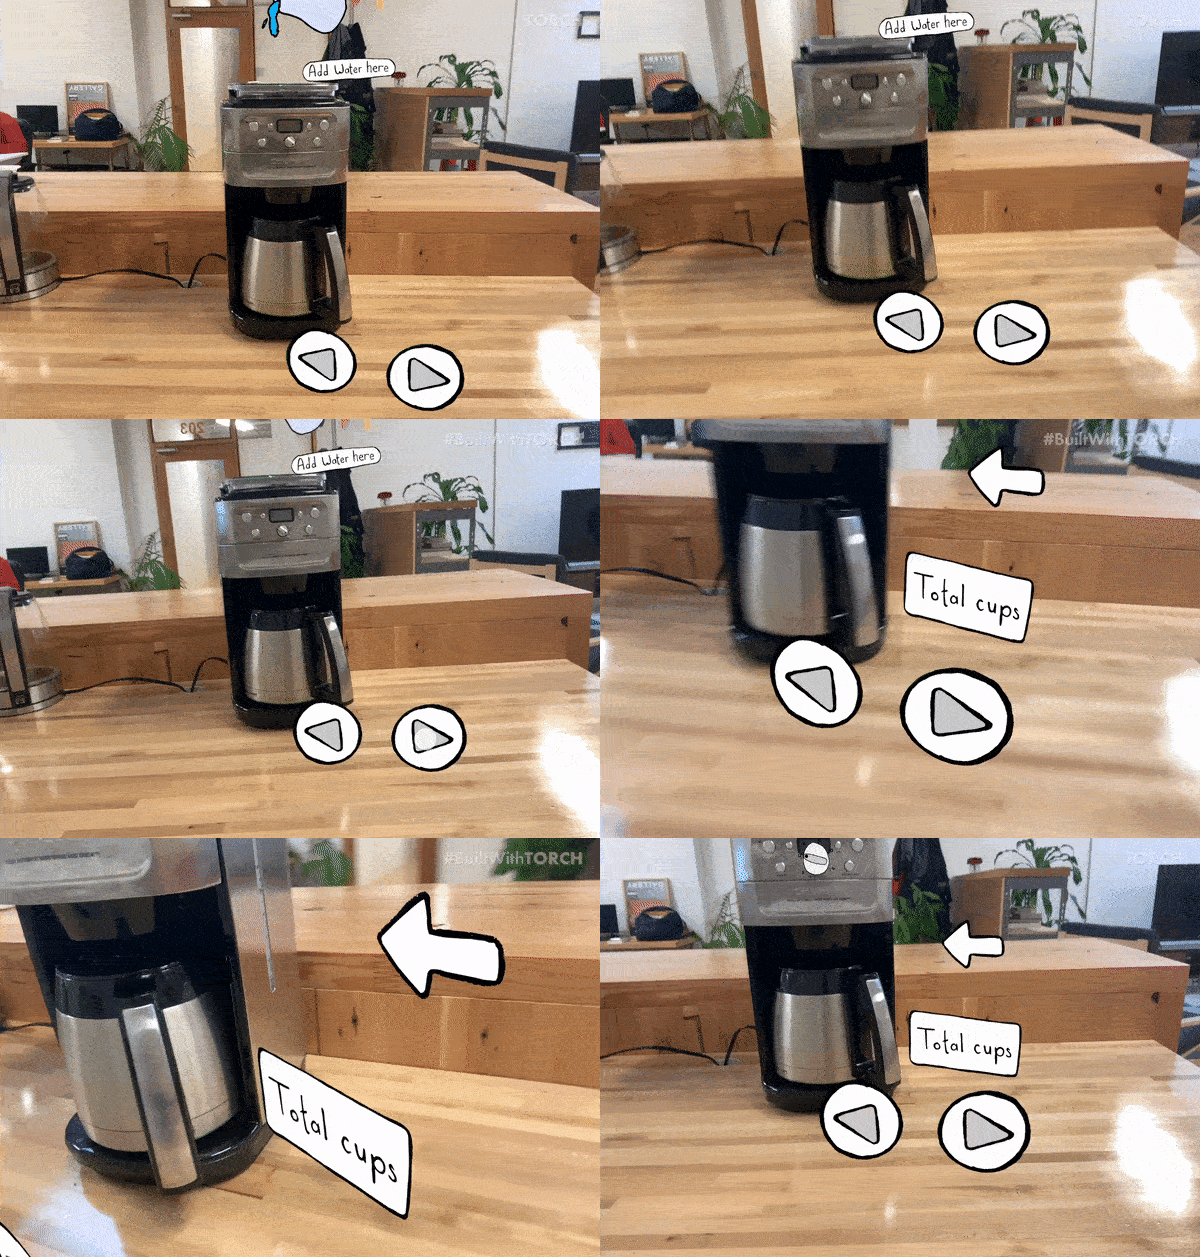
Each scene will have videos or GIFs positioned around the coffee machine near the parts the user needs to interact with. Additionally, we will have process buttons, off to the side, that move users back and forth through the steps and interactions.
I also created an alternate version of the app with recorded videos instead of animations. Here is an example of the water pouring scene using video:
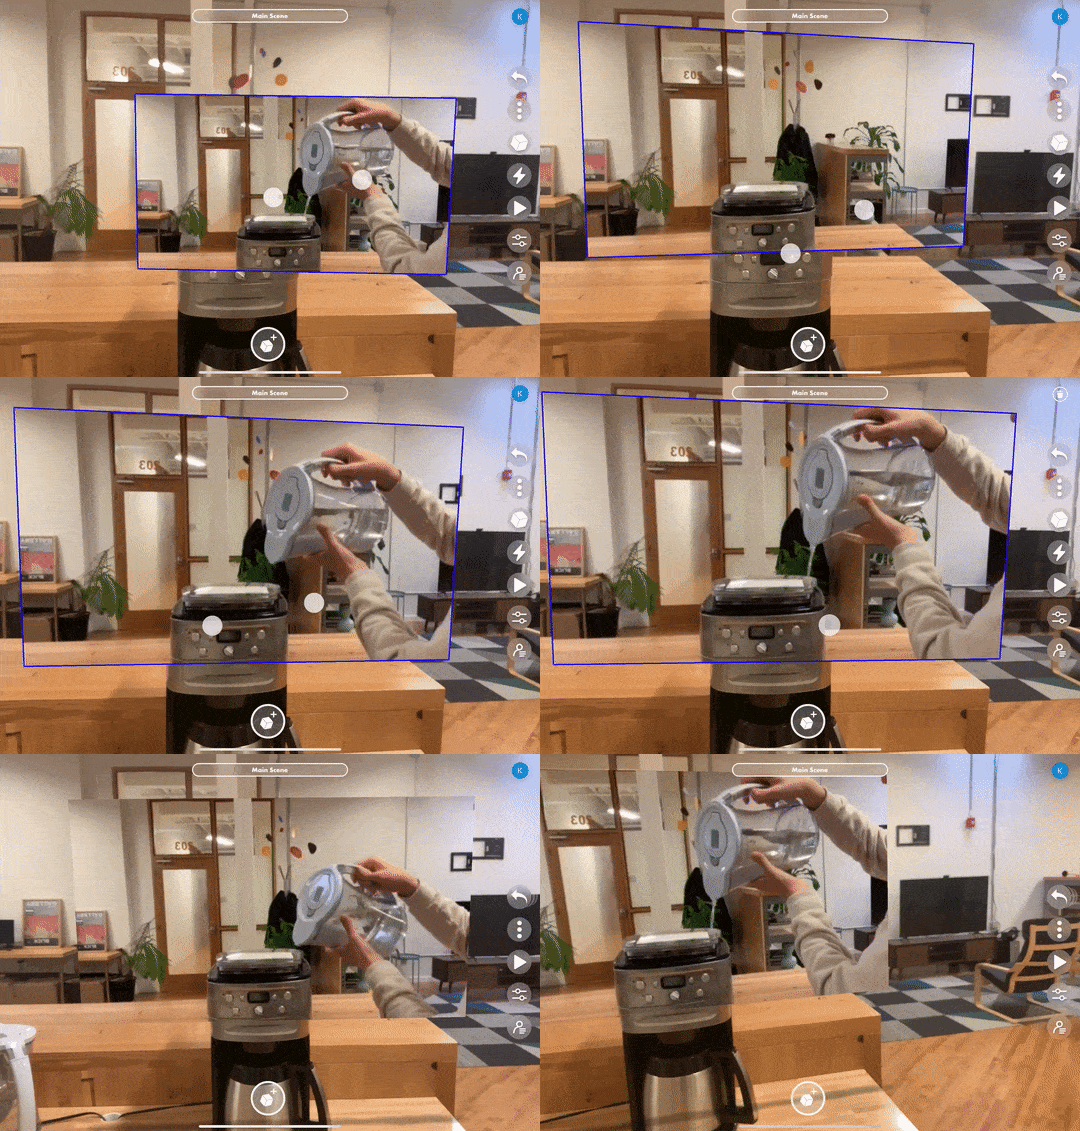
Add interactions. Just as with Figma, interactions in Torch make the prototype feel more authentic and give the user a view into the actual app experience. With our elements already in the scene we can start to add the interactions. We want to create the interactions that guide the user step-by-by and show them they’re on the right track.
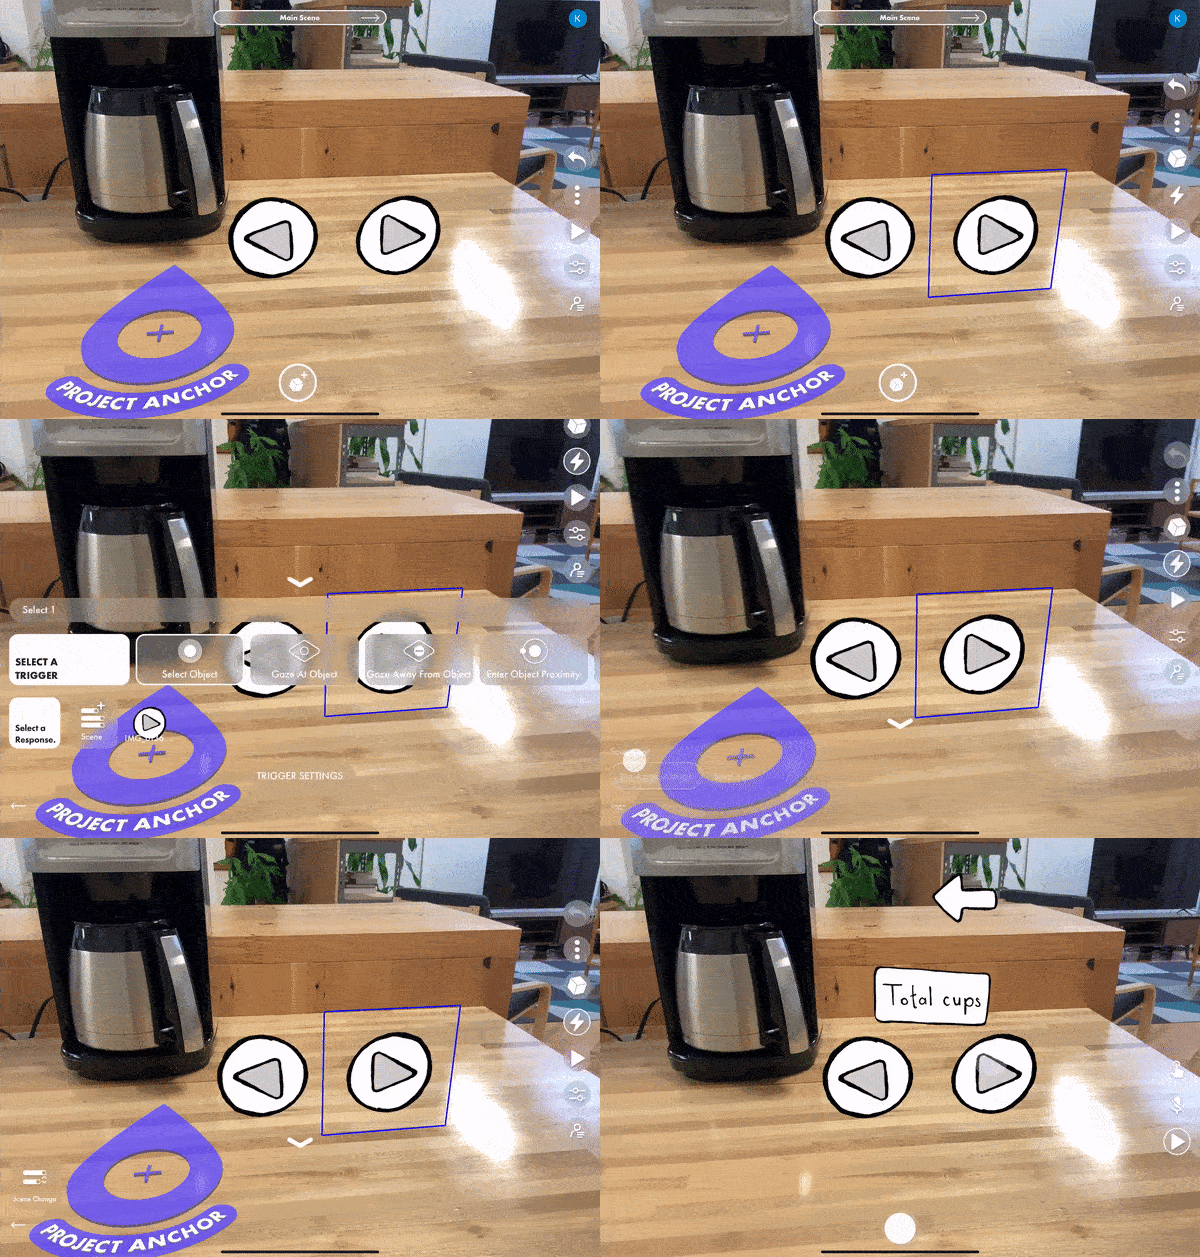
For this app, the only 3D interactions we need are the forward and backward buttons that allow users to navigate between scenes. The forward button will take us to the scene with the next step after showing a quick success animation. Similarly, the back button will take us back a step in case the person interacting wants to see it again. Watch this video to learn more about adding interactions that navigate between scenes.
Step Three. Integrate Figma and Torch into a single workflow
Now that we have all the 2D and 3D elements built out, we can integrate the Torch project into the Figma prototype for a seamless mobile AR experience. It’s really easy and adds that WOW-factor to your design.
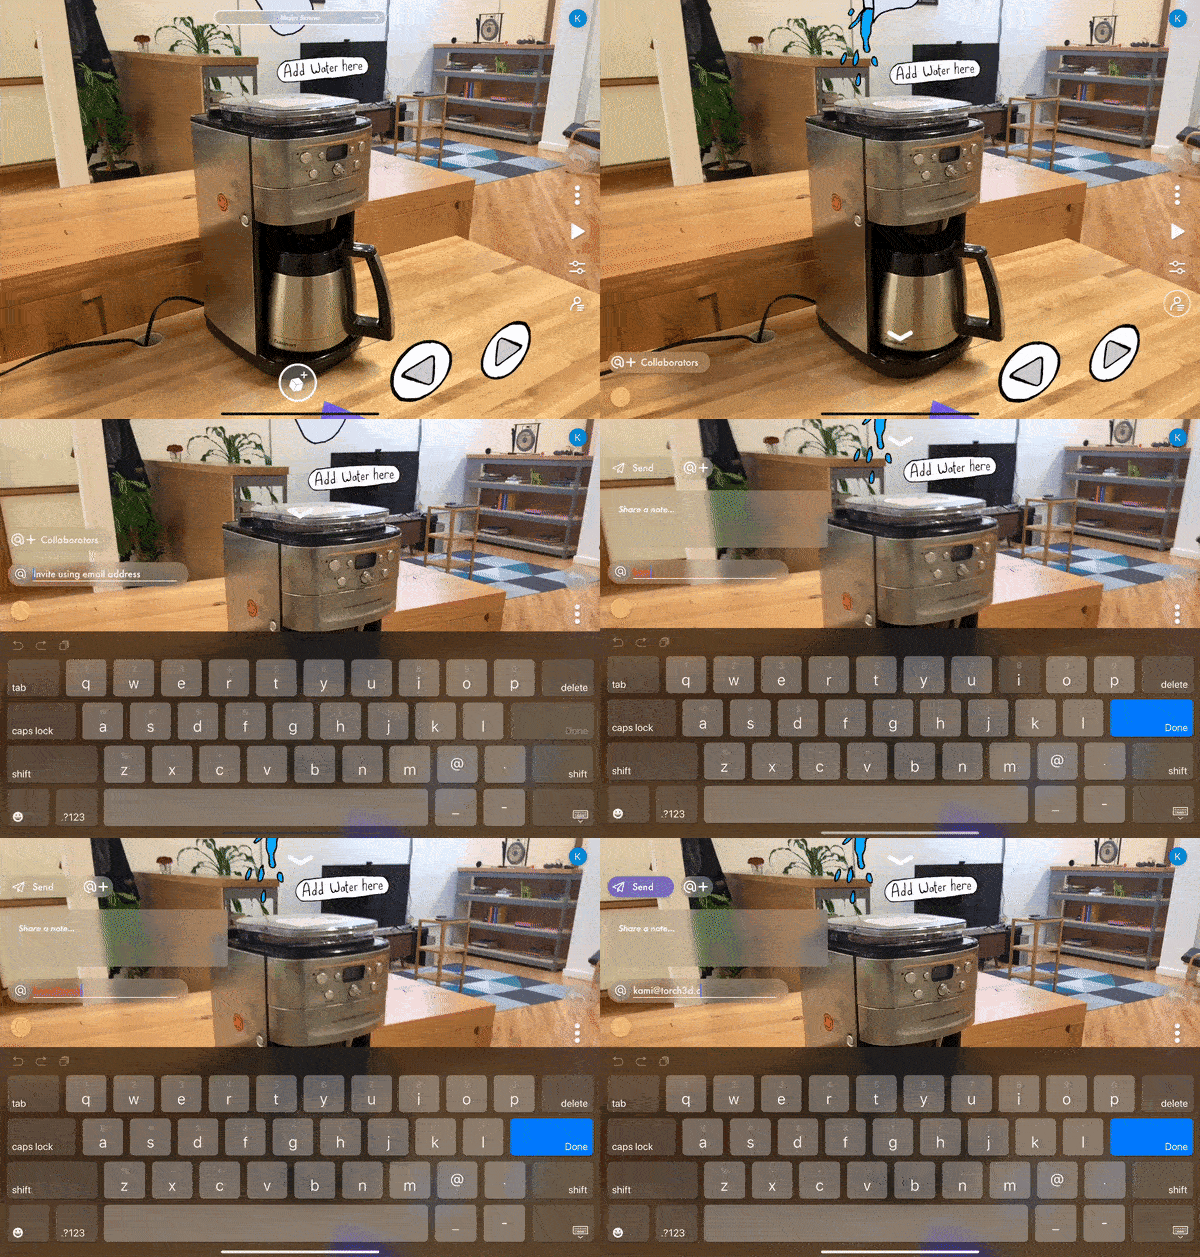
Activate the Viewer Link for your project. In the Design Environment, tap and open Project Settings to activate the Viewer Link for your app. Copy this link and head back to Figma.
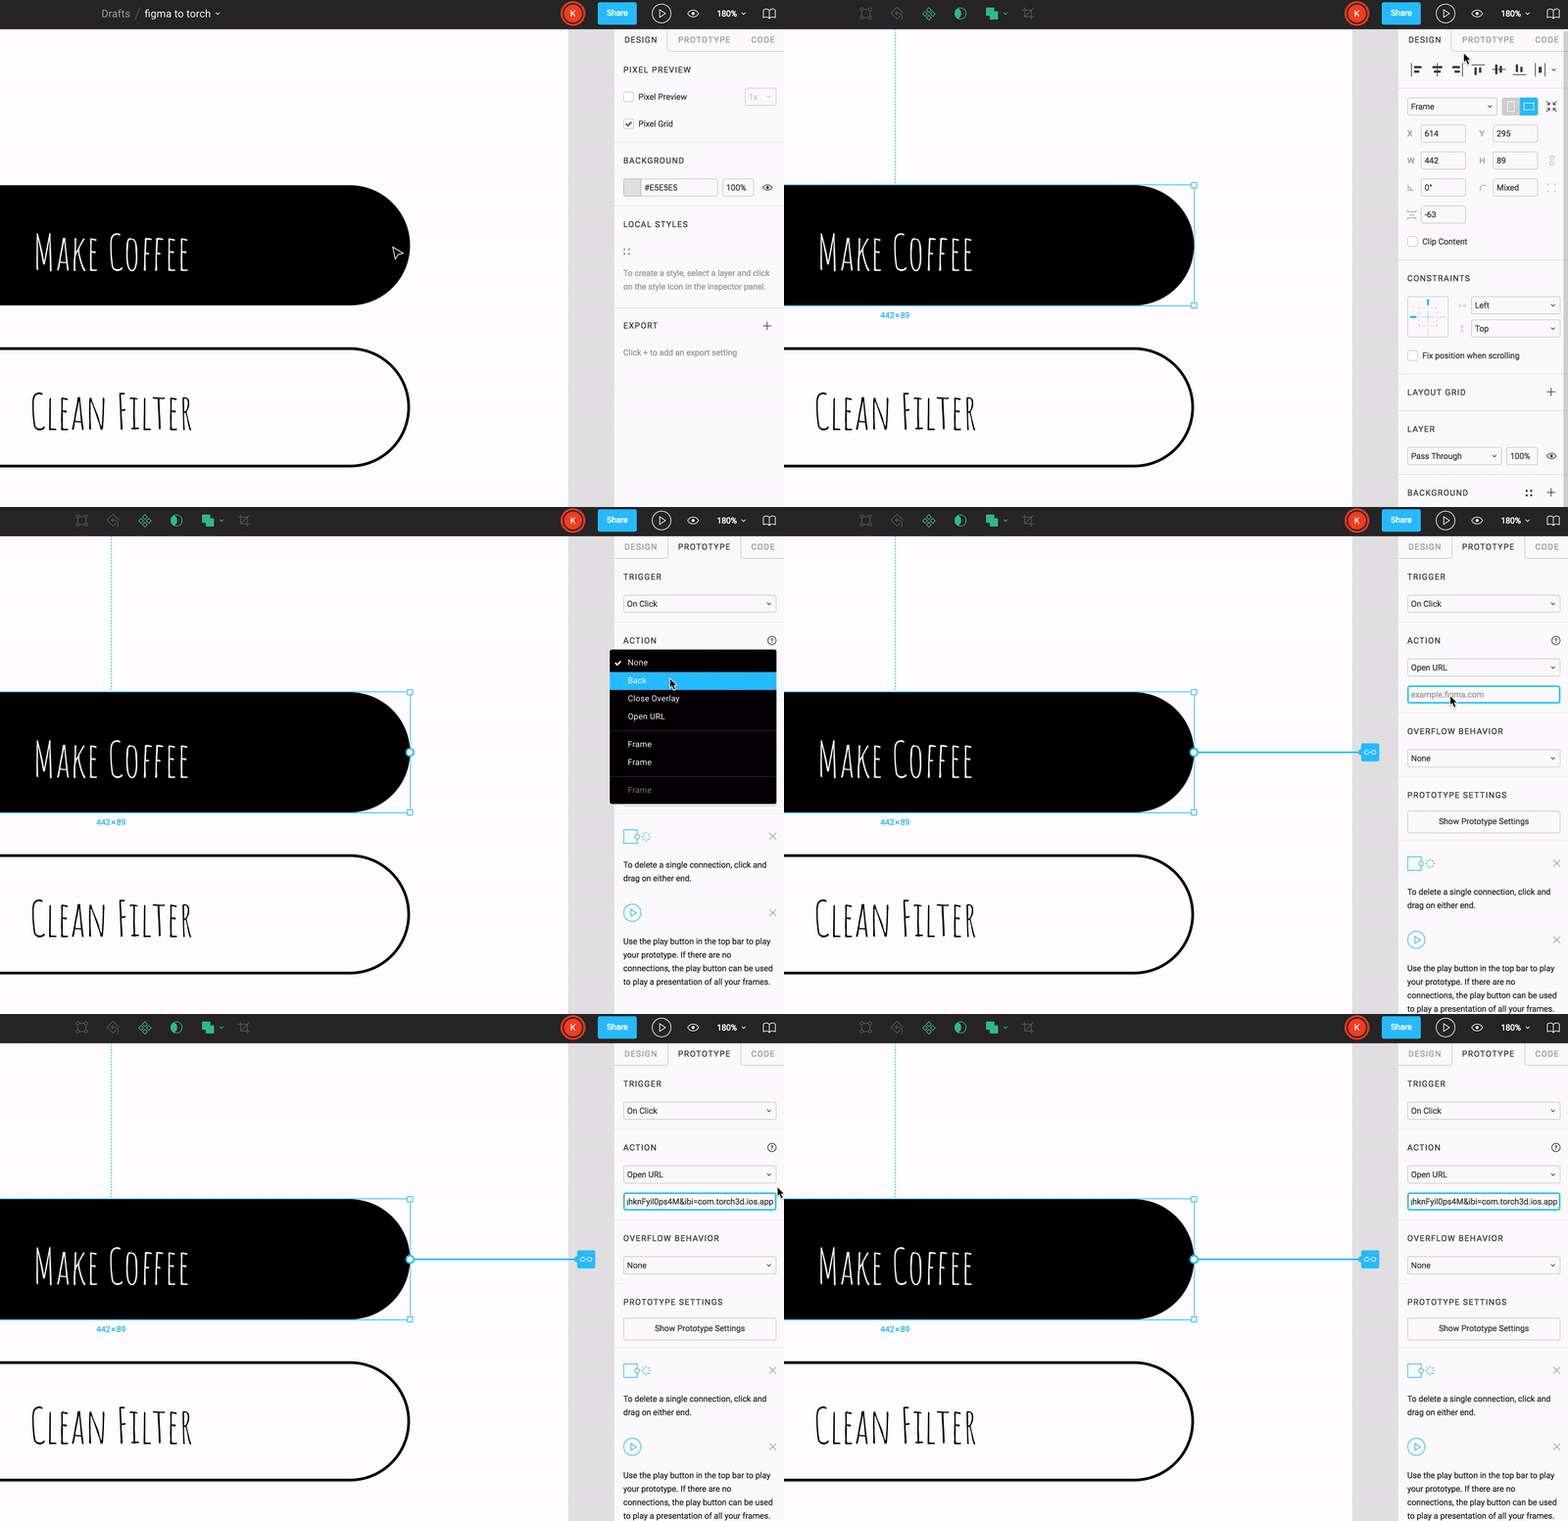
Select the button element in Figma that should launch the Torch project. In the right panel, select the Action drop down under and change this setting to “open url.” Then, paste your Torch link into the text box below the drop down.
Launch your prototype. To view your new immersive app, open your tablet’s browser and log into Figma and select “request desktop website.” (Pro tip: Since it’s difficult to build with Figma on a mobile device, plan on finishing any further 2D project edits on a desktop device.) Don’t worry about syncing your project and devices, since Figma is a cloud service, your project travels with you, wherever you’re working.

Test the end-to-end workflow before sharing your designs. Enter prototype mode in Figma, which will open up a new fullscreen window, and go through the experience to test each step of your final creation. If you open prototype mode on your device during the design process, it can also serve as a mirror mode – updating the tablet prototype as you edit on your computer.
.gif)
Way to go! By adding the 3D interaction capabilities of Torch to your existing prototyping workflows in Figma, you can now quickly design and iterate on immersive mobile AR designs.
What will you create with this new cloud-based interactive workflow? We’d love to see your great work – share your creations with the tag #builtwithtorch.


