


Editor’s note: We’re constantly impressed with the augmented reality projects and prototypes you have #BuiltWithTorch and shared online. When we saw how Ben Wilkoff designed and recorded his application for the Apple Distinguished Educator program using Torch AR, we were struck with how augmented reality enhanced his storytelling. To help you craft your own AR story, we’ve asked Ben to share how he developed his project and why he chose AR. Thanks Ben! - Nathan
Augmented reality was the perfect tool to share our story.
I create and support Digital Education for a living.
For most people, that can be a pretty confusing idea. The closest many folks have come to digital education is taking notes on a laptop while listening to a lecture or taking an online class that they would rather forget about. So, when asked to explain what I do, I generally take my right hand to represent technology and my left hand to represent the best learning experience you ever had (imagine learning as you walk along a forest trail or having the best debate of your life about something you genuinely care about) and clasping my two hands together.
Or, I just show them with Torch AR.
You see, Torch sits at the intersection of great technology (ARKit, open development and design processes, and access to thousands of 3D objects) and great learning (exploration, play, collaboration, and inquiry).
This app, brimming with functionality and future opportunity, is exactly what I was looking for to help me tell a story, the story of what Digital Education looks like at my school, The University of Colorado’s School of Dental Medicine. Specifically, I needed to make a 2-minute video telling our story so that I could be selected in the Class of 2019 for the Apple Distinguished Educator program.
For those of you who are unfamiliar with this program, Apple recognizes individuals in K-12 and Higher Education who are transforming teaching and learning–with the help of Apple technology. Fewer than 1000 total educators in the Americas have received this designation since 1994. To get Apple's attention I knew that I had to put together something pretty spectacular. After working with the app for the last few months, my choice to use Torch AR to design my application was a no-brainer.
This entire experience and video were completed on an iPad in about a day. While I don’t think it is perfect, it is certainly something I am proud of.
So, that’s why I made this video. This next part dives into how I did it.
Step 1: The idea
I knew I wanted to give a tour of the school through the lens of my iPad camera, so I started to consider what all of the “checkpoints,” or, scenes in the world of Torch AR, would need to be. These are the ones I plotted before I started designing anything.
- Video introduction
- Examples of student work throughout the lobby
- Demonstration of how faculty members use technology to teach in the education buildings
- Examples of how technology is used in the lab environment
- Demonstration of what technology looks like in the clinic
Step 2: Gathering assets
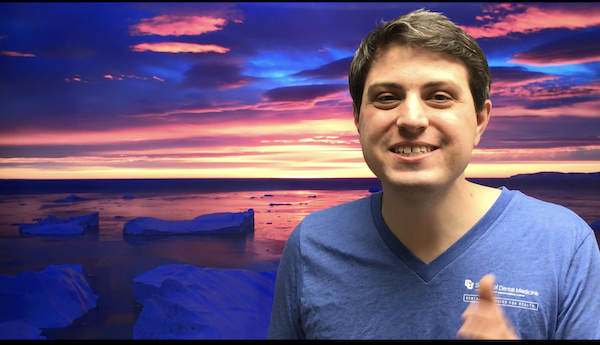
I filmed the intro video by putting an Apple TV screensaver behind me on a television and pressing the record button on my iPad. I could have done some green screen work, but this made the process go much quicker, and I really love this backdrop.
All of the other examples came from simply capturing images around my school, wherever I saw or made cool things. The 3D models I needed were scans of teeth, so I pulled one from our database of 3D scans–a common practice in modern dentistry.
Step 3: Building scenes & choosing anchors
I knew that I needed to create scenes for each floor or “space” within a single floor that I was going to visit in our building. I also knew that I needed to anchor the project with things I could reproduce every time I did the “tour”. I looked for the most obvious place to put my introduction video, which happened to be the obelisk that shows the floor directory of the building.
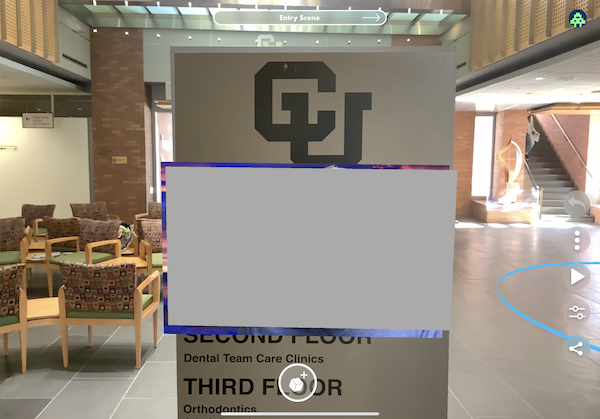
I also used the Tracked Image feature, currently in limited testing, to anchor the video to the right spot on the directory. This helped a lot with making sure all of the other objects in the scenes stayed in the right places, too.

As I continued to build the scene, I realized that I needed to grab assets from Poly to help move the story along. First, I needed an arrow to show where to go.

After that arrow was placed correctly, I added two interactions on the arrow that make it twist and move through the space.
From there, I found that I could not consistently place the other objects in the space because our lobby is just SO LARGE. To fix this, I needed to anchor a new scene with another Tracked Image.

This piece of art and its plaque worked really well for the 2nd scene’s anchor, and it allowed me to place objects up the stairs and behind me with a consistency that I couldn’t get if the whole experience of the first floor would have been developed as a single scene.
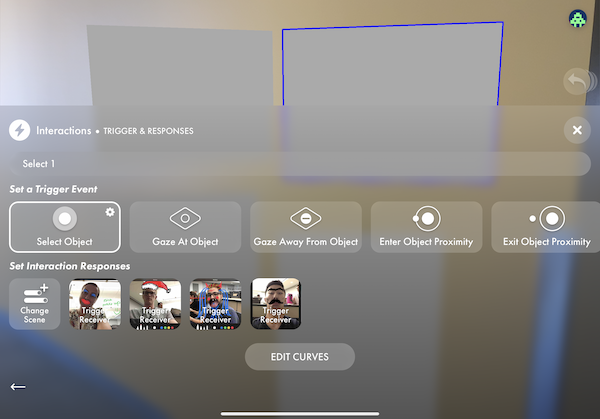
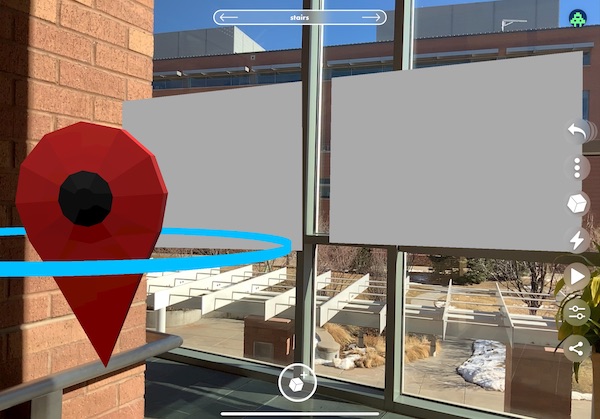
As I moved through the scenes, I realized that I needed a way to initiate new scenes or reveal images, so I grabbed a “map marker” and placed it whenever I wanted the other objects to appear–using an enter proximity trigger to start the interactions. In this case, I needed these images to appear correctly on the windows–I wanted the scene to change as I went through the marker.
The next tricky part was to figure out how to place objects behind doors so that they wouldn’t show through. This required changing scenes directly in front of the door with another map marker and anchoring the next scene to the front of the door.
.png)
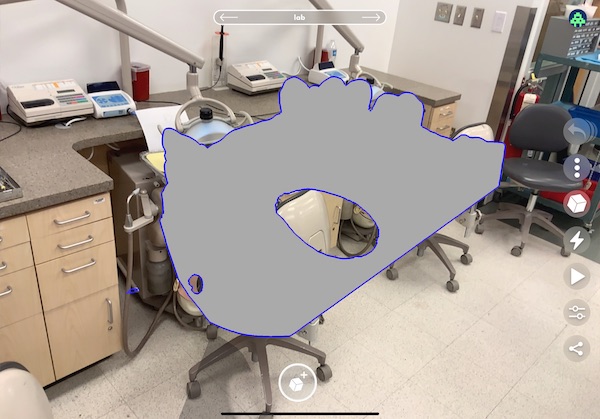
From there, it was just a matter of placing the 3D teeth in the lab. And, adding the last scene in the Clinic, behind another door and with another map marker.
Step 4: Record, edit & stabilize
Seeing as I wanted to record all of the system UI elements, I used the Screen Recording feature of iOS. This allowed for Torch to do what it does best, rendering the AR environment, without also having to record the interface. Additionally, it let me do a number of run throughs without stopping and just keep the footage that I wanted.
I also wanted to add text and other visual elements to the video to flesh out other elements of the story that I didn’t have time to add in augmented reality, so I used Luma Fusion to edit the video. Luma Fusion was the easiest way for me to keep the whole workflow on the iPad as well, including recording voice over, boosting audio, and cropping the video.
One thing I know about myself is that my hands are no match for a gimbal or tripod, so my initial video was incredibly shaky. To compensate for my lack of poise and smooth walking, I used Emulsio to stabilize the video.
Step 5: Reflecting on the process
One of the most important things you can do with any educational experience is to reflect upon it to see what worked, what didn’t, and what could be done differently and better next time. Here are a few of the most important reflections I have for this experience.
My favorite parts of the process were creating the right triggers to allow for movement throughout the space. The whole concept of interaction with digital 3D objects in a physical space feels magical. This one makes me smile every time.

I enjoyed the process of building out whole rooms of digital objects and interactions. Through this process, I realized I was creating an app out of the space I inhabit and work in every day. It made me far more aware of the opportunities for adding interactivity to augmented reality scenes. Working and testing quickly in Torch gave me the abilities to try an idea and then edit the experience in the moment. Given more time, I would love to build out an AR experience for each room in our building as well as provide a tour for our education buildings on campus.
I see huge potential for all of our indoor spaces to be filled with digital objects that provide more context and more learning! I keep on thinking about how useful a shared digital layer of objects could be.
Imagine “anchoring” ideas to the physical world around you, whether those are images, video, audio, or 3D objects. Torch AR is great for telling this kind of story. In fact, I believe there are no limits to building new experiences when all you need is a decent space, a few digital assets, and an iOS device–with Torch installed, natch.
So, that’s both the why and the how for my story of Digital Education, #BuiltWithTorch. I’ll let you know if Apple likes it.
Oh, and for the record, this whole blog post was created on my 11-inch iPad Pro, including the animated gifs. #RealWorkOniPad.


