Designing 3D experiences on your phone or tablet with Torch AR allows you a visual, code-free way to build and share AR apps and concepts quickly. Just like any design tool, once you learn the essential functions and workflows of Torch, you'll be building immersive, interactive AR apps, like this hotel reservations app, in no time. But first, let's cover the basics of getting started.
This set-up guide walks you through the first steps of starting a new project in Torch: opening a new project, scanning your environment for planes, and setting the World Anchor. In our next installment, I'll share tips on importing and manipulating assets in your AR space.
To follow along with this tour, download Torch AR.
Step one: open a new Torch project

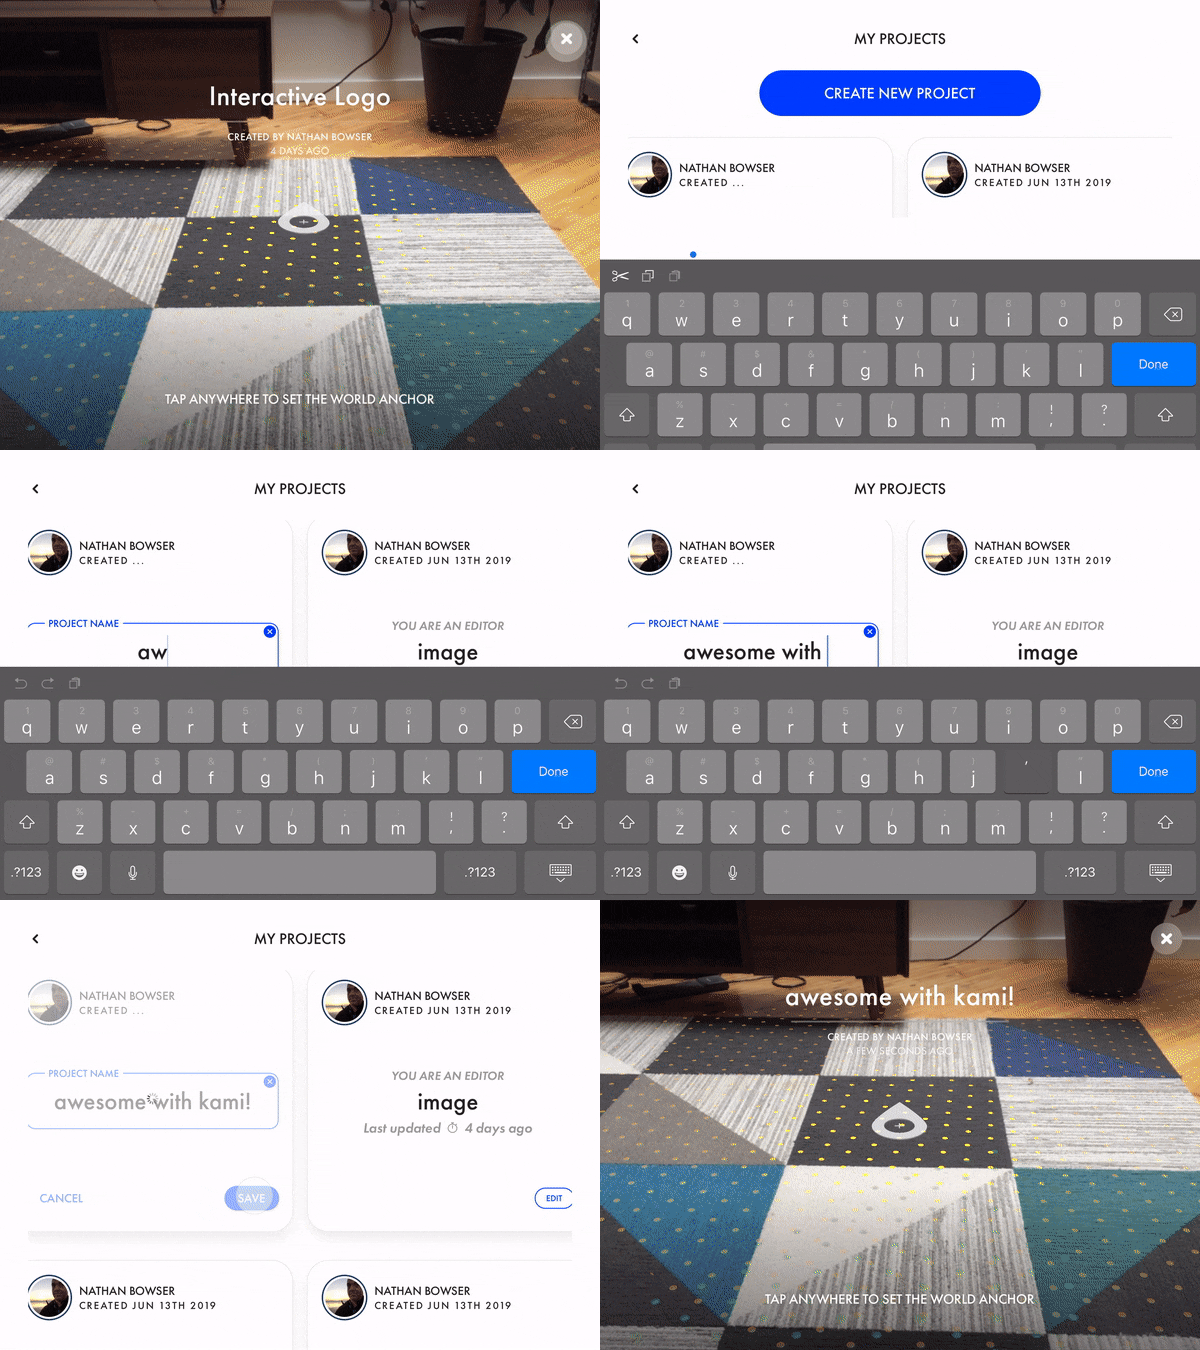
For our tour, we'll start by opening a brand new project and giving it a name. To do this, tap your avatar in the upper right corner of your screen and then tap the projects list. From the top of this list, choose to Create a New Project. When prompted, give your project a name. Be descriptive—I suggest "awesome with Kami." Click done, and we're off to the next step.
Now, when you open up this new Torch project, you'll see this animation of a device being waved around. That's because the app wants you to wave your device around to look for some horizontal planes or ground planes. Slowly move about the room, scanning your space. When Torch has found a plane, you see a field of dots, and the anchor icon appears on that surface.
You'll see that the anchor is moving around a bit as you scan the area some more, but that's fine, it is just getting to know the space better. If you see some different colored dots show up, that means your device found a new plane. In this example video, Torch found a plane that's higher up, hence the bigger dots. When you're ready, you can go ahead and place the anchor in the spot you like.
Pro Tip: Not seeing any dots or anchor icon? Make sure you have a good internet connection and a bright, well-lit space to work in—projects with a lot of assets take a moment to load.
Step two: Setting the World Anchor
Once you're happy with the planes that the Torch App has found, the next step is to place your World Anchor. This is going to be the center of your project, so put it somewhere that you'd like to work and walk around. When you start a project, you can easily move the World Anchor by moving your device, like I'm doing in the video, or you can free-form move it with familiar gestures.
One finger dragging the anchor moves it around the ground plane. You can also use two fingers and rotate them—that rotates the anchor on the plane. Another trick is using two fingers dragging up and down to move the anchor up and down in the space. Once you're happy with the placement, tap anywhere to set that anchor.
Step three: resetting the world anchor
But Kami, what if I made a mistake and I placed the anchor for a table-top app to the floor? Can I change the anchor point?
Yes, no worries. At any time in the Torch Design Environment, you can move your anchor to reorient your project. To do so, just long-press on the anchor until it turns yellow. From here, you can move it around, free-form, while also seeing the ghost of the previous anchor. When you like your new spot, tap on the screen anywhere. Bam now your app is anchored in a new location.
You can also choose Reset World Anchor from the project settings menu, on the right side of your screen. This will take you to the blank start-up screen you saw on opening your project. Here you can move the anchor with your device or free-form gestures, then tap when you like the position.
Pro Tip: When you have 2D & 3D assets in a scene, and you long press the World Anchor, you see all your assets move along with the anchor. This is an especially nice feature if you're trying to perfectly align your app with specific physical elements in your space.
When you choose "Reset World Anchor" from the project settings, you see only the World Anchor. This mode is helpful when you require a precise anchor point, but your scene is crowded with models and 2D assets.
Now, go explore
Congratulations. By now you should be pretty comfortable finding planes, setting a World Anchor, and resetting your project anchor. If you'd still like to dive deeper into these topics, please head over to our Help Docs or our YouTube channel. Or, now that your AR world is anchored in your room, why not explore? Place some objects in the space and test them in Play Mode.
In my next series of videos, I'll show you how to bring 2D and 3D assets into your Torch project using your camera roll, device storage, or through integrations with apps like Poly and Sketchfab.
Stay Tuned!


