As a designer who has recently started working in augmented reality (AR), I regularly turn to the skills, tactics, and tools I relied on as a designer for 2D screens and experiences. In school, I really enjoyed using After Effects and set a professional goal to use the tool for work as much as possible. So my heart jumped when my boss turned to me earlier this week and asked “Do you know After Effects? The Torch 1.14 release supports transparent video and gifs and I need your help creating some assets.” I’ve literally been waiting my entire design career to write this post!
Adding transparent video and gifs to AR is a great way to prototype animations, direct user attention to design elements, and quickly annotate the world without occluding parts of the scene. Video brings warmth and character into your scenes and video without a bounding box feels like magic.
.gif)
Creating transparent videos from green screen footage sounds a lot more intimidating than it actually is. If you have After Effects and a video with a beautiful green background, you’re only a few clicks away from a transparent video. Just like me, you’ll be impressing your boss in no time.
Start with your green screen video
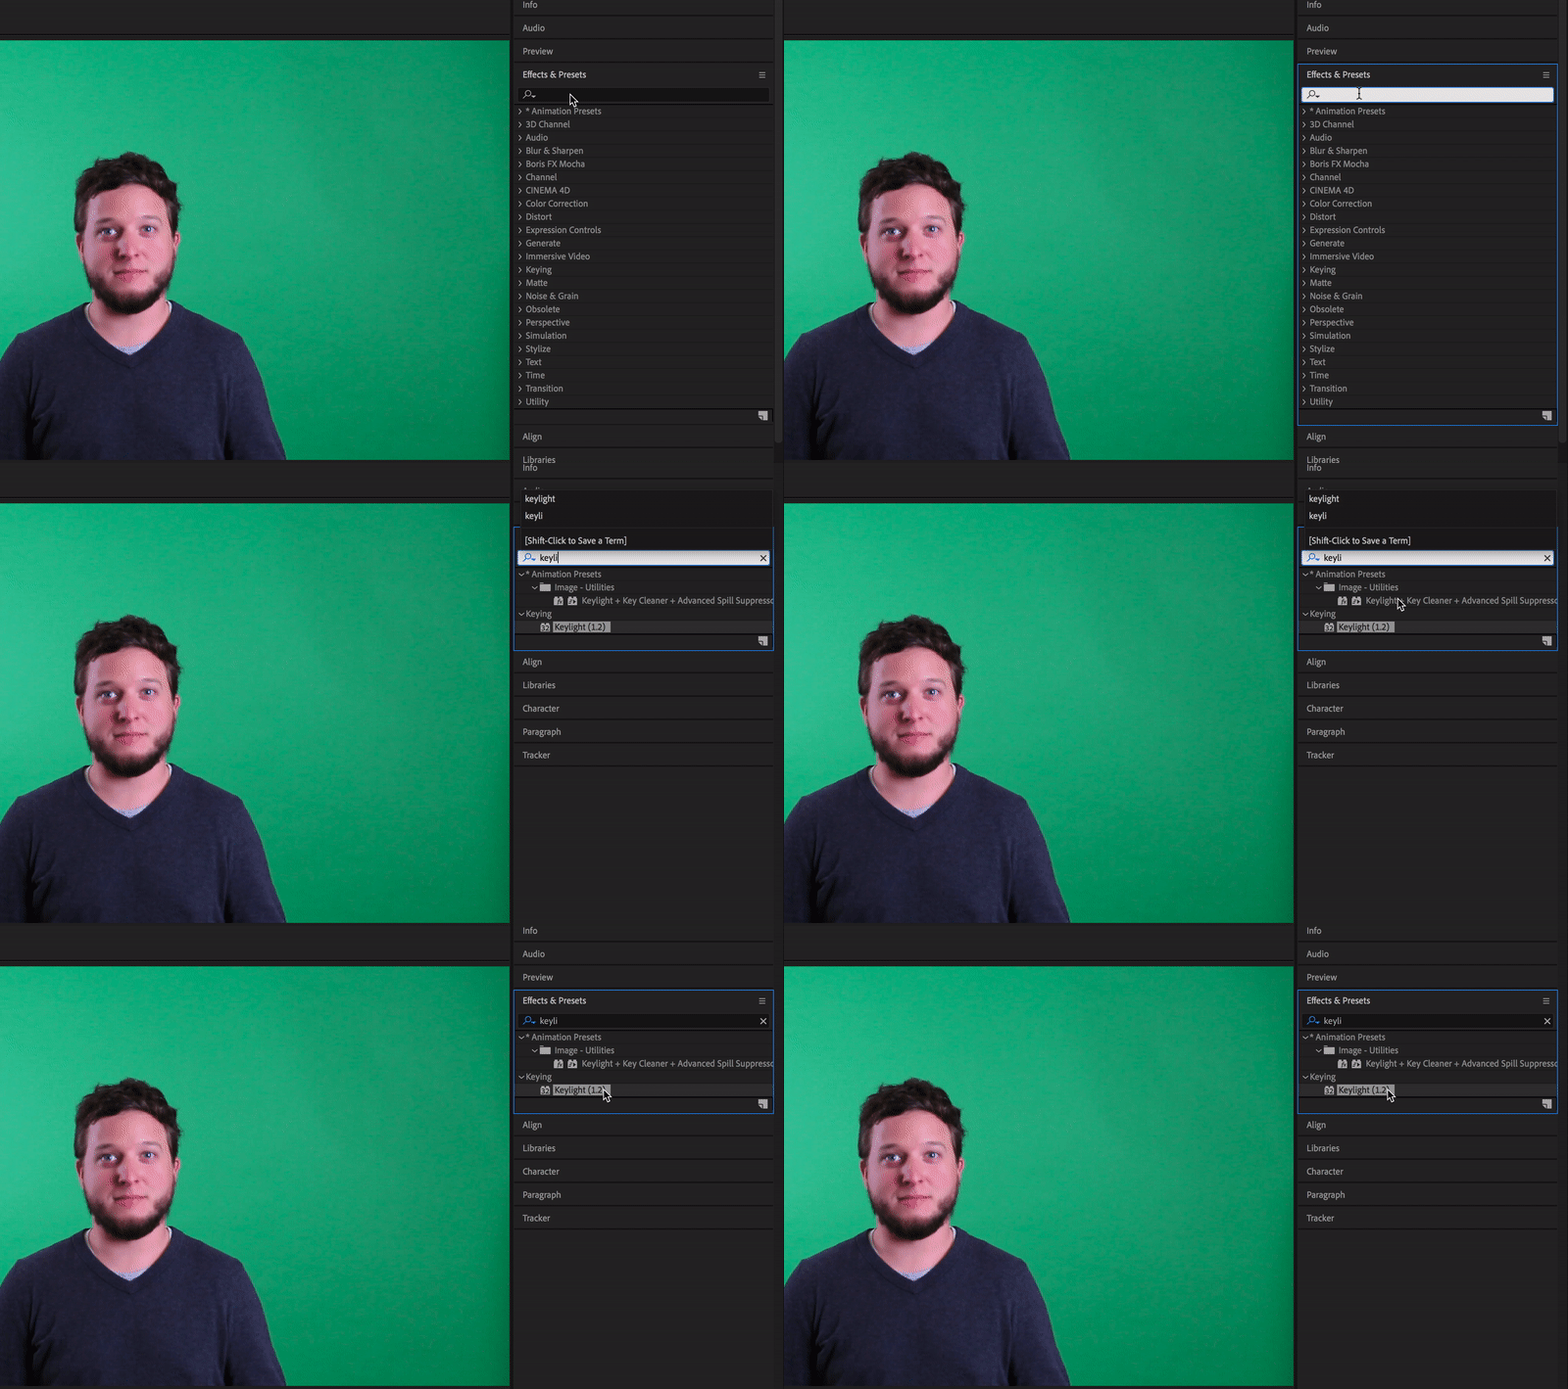
Open up your green screen footage in After Effects and find the Keylight effect in the “effects and presets” menu on the right. Make sure the layer with the footage is selected and double-click the Key Light effect.

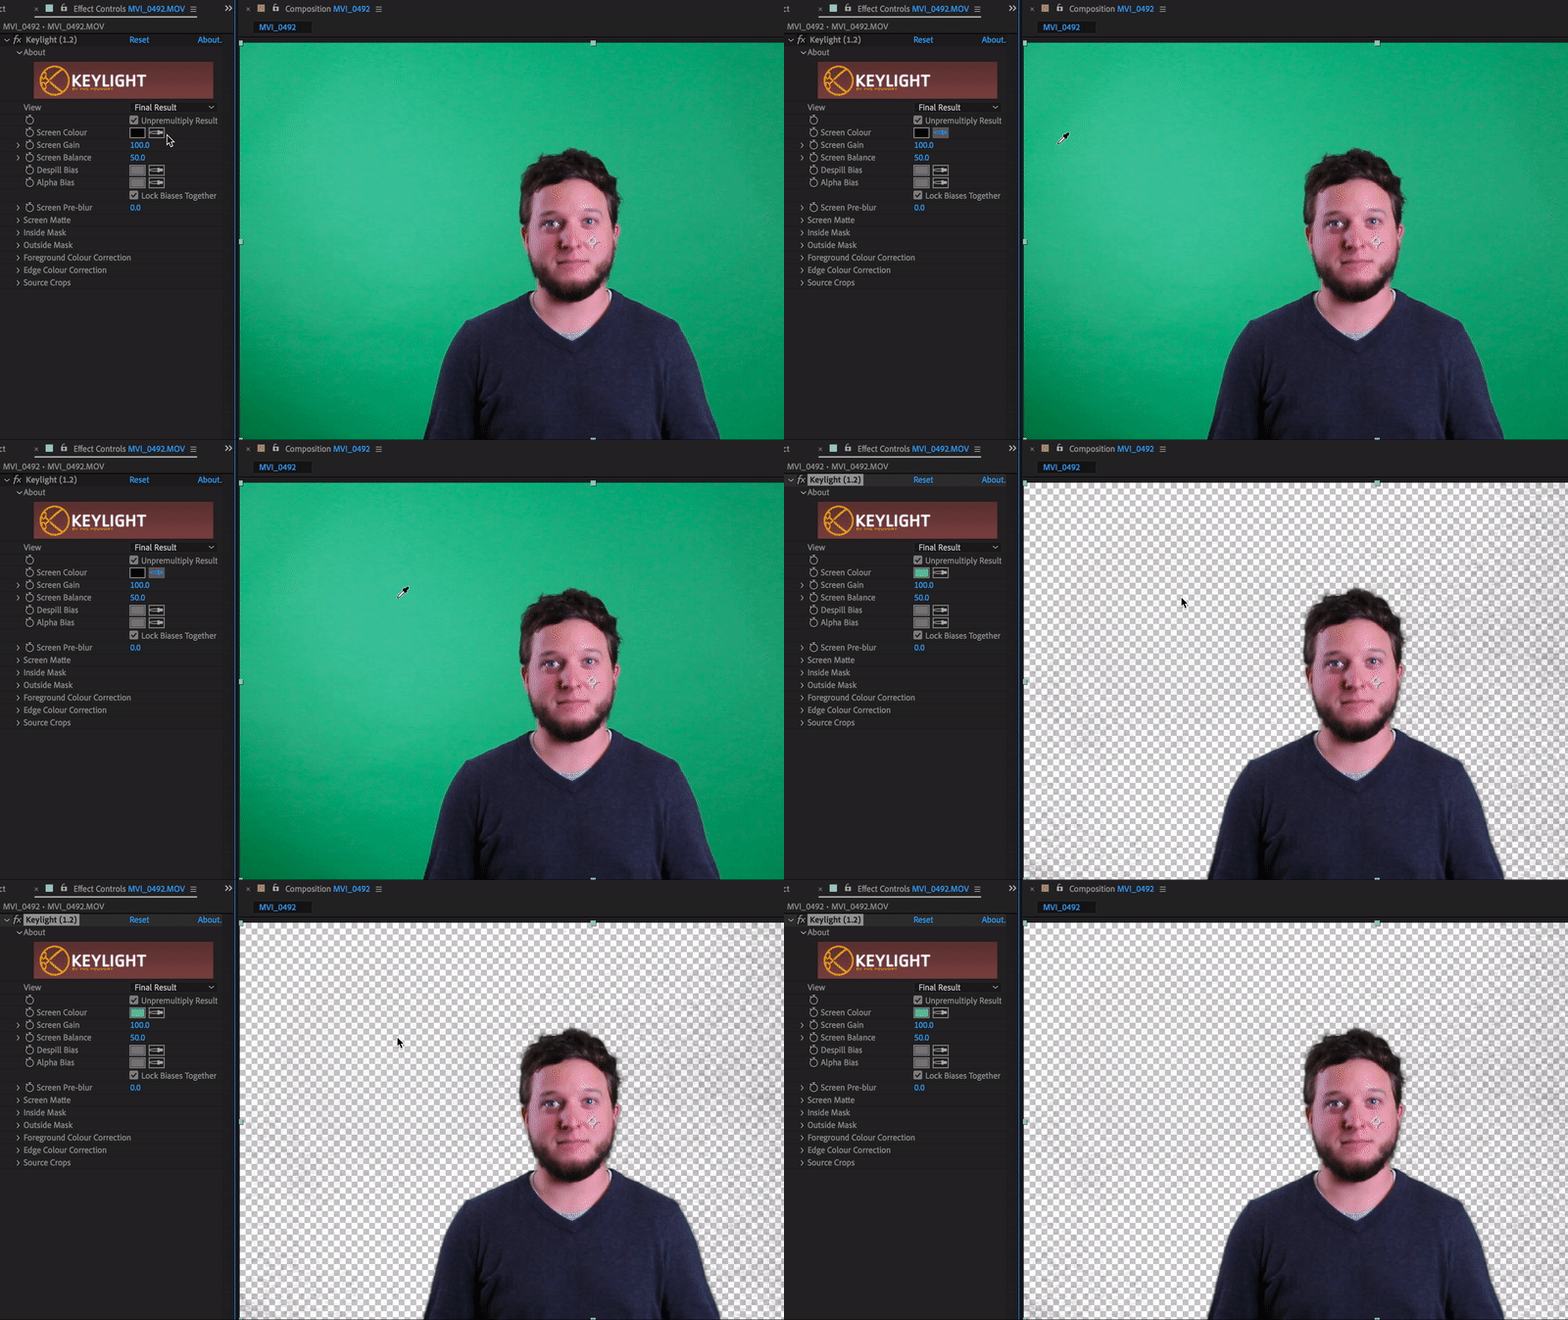
Just adding this effect won’t do anything, but if we use the eyedropper labeled “screen color” we can tell the script that our screen is green and it should change anything that’s green to transparent. This would be true for any color you select. If you selected yellow, all the yellow would go transparent.
Remember, this tool grabs all the pixels that are very close to your selected color, which means if you have shadows or highlights they might get overlooked – lighting is key for all video projects. This also means you should never wear green shirts in front of a green screen unless you’re going for that disembodied head look.

Clean up the shot with screen gain
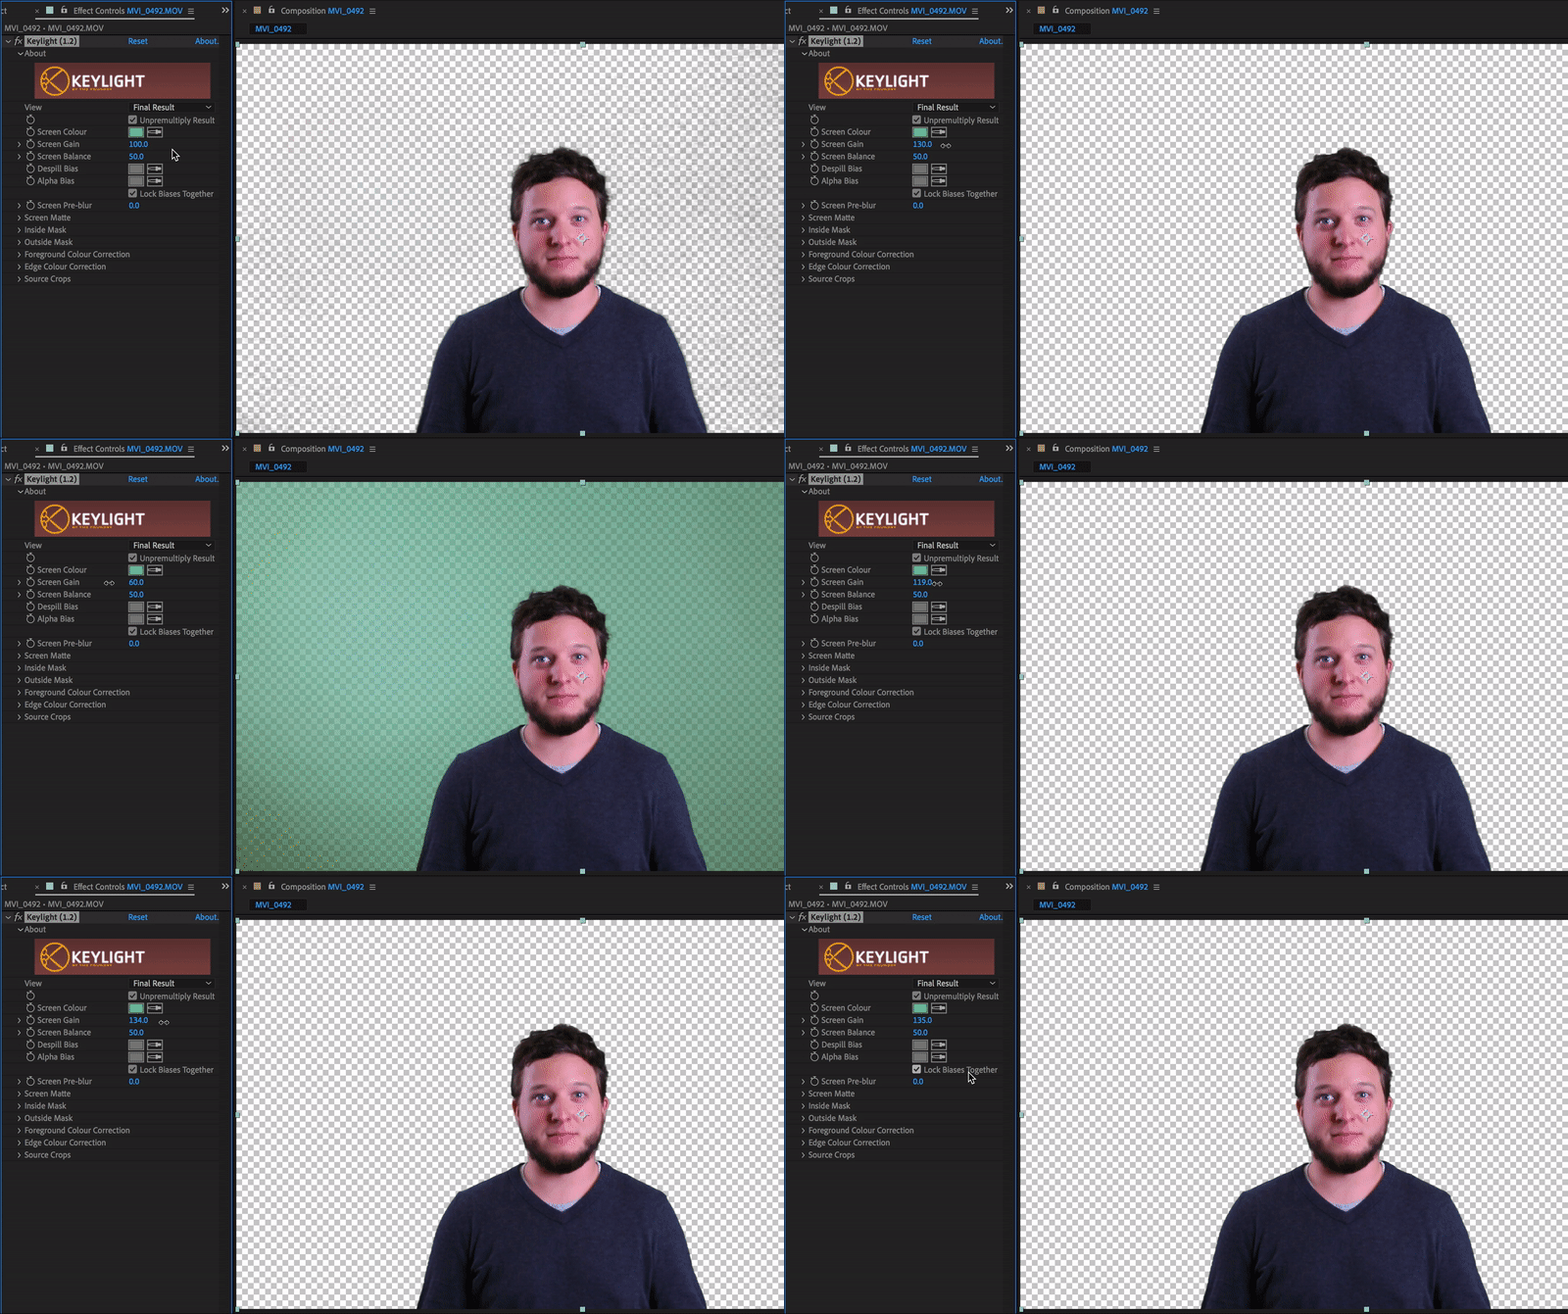
As you can see, removing the green background can sometimes leave behind some fuzzy artifacts. To eliminate this blur surrounding the non-green figures in our shots we use “screen gain.” Simply increasing the screen gain a little can solve most flaws. To note: screen gain adjusts the continuum of color that is omitted from your shot. Increasing the gain removes more shades, but if you turn the screen gain down you will see more green shades that no longer make the cut.

Set your render settings
Once the Keylight process is taken care of, it’s now time to render the video. Add your composition to the render queue – not the encoder queue. From the render queue, select the output module option currently set to “Lossless” in the below image.

Remember the Alpha Channel
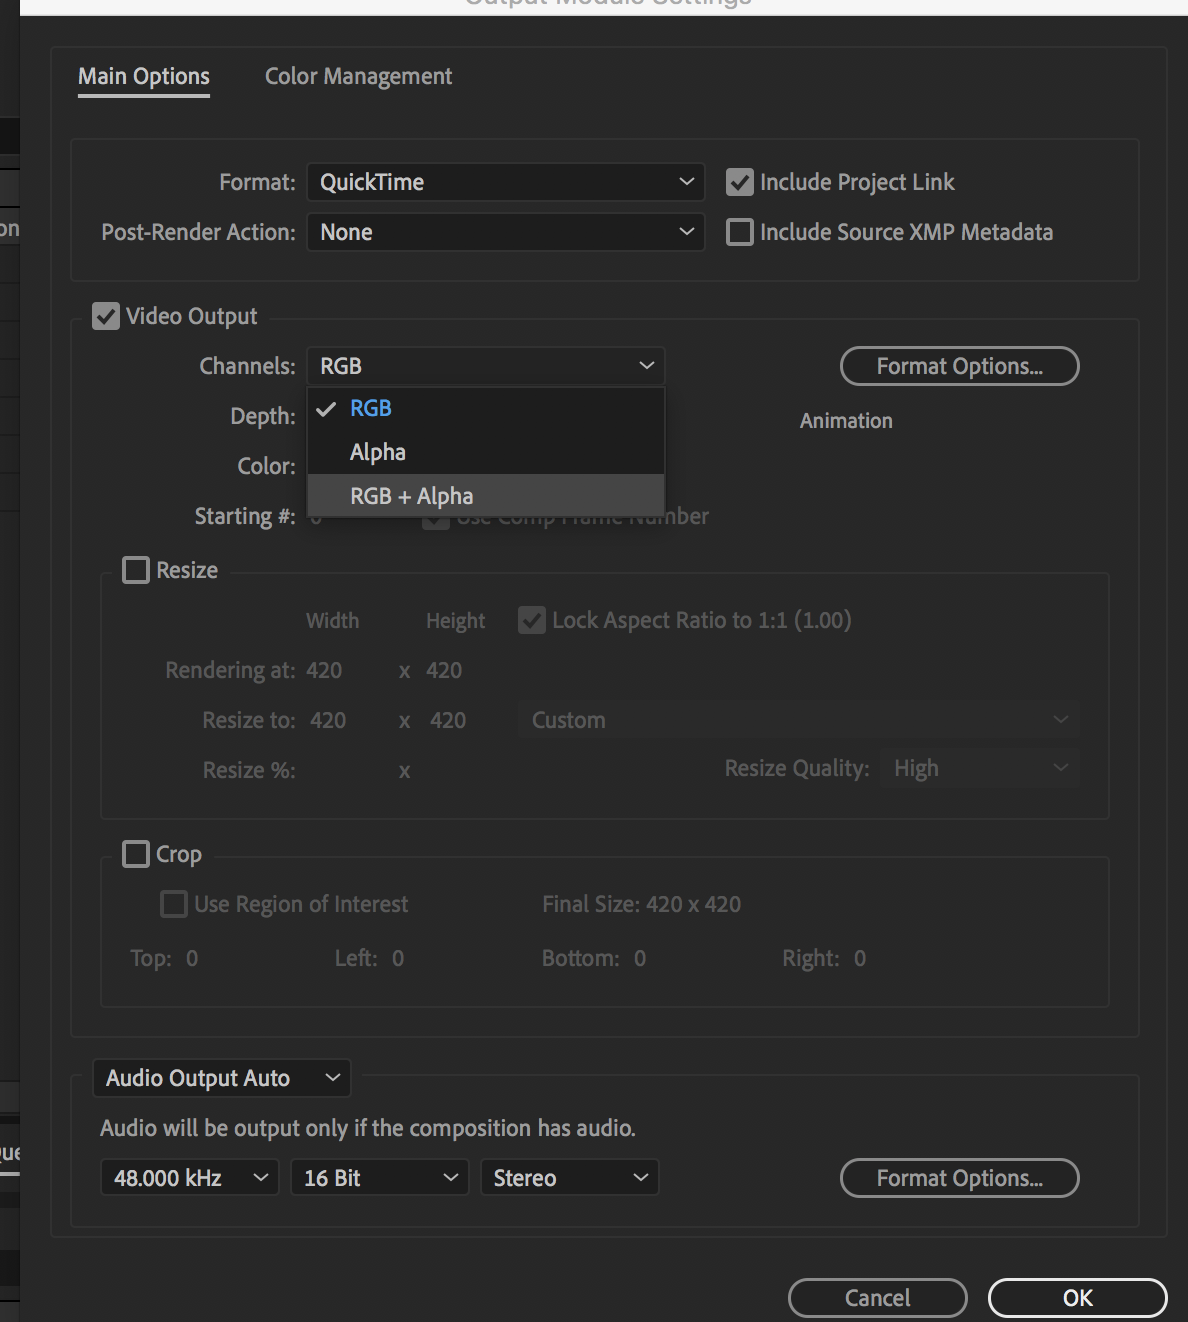
Navigate to your video output settings. You’ll want to change the channels from “RGB” to “RGB + Alpha.” The alpha channel is what gives this video transparency, without this setting selected we would get black where we want transparency.

Once your video has rendered, it’s now ready to add to your AR experience. If you’re building your experience in Torch AR, you can easily import the video into your project through any attached cloud service like Google Drive or iCloud. You can also save your videos to your camera roll and import them straight into the project.
There you go, superstar! You’ve made a helpful transparent video for an augmented reality experience and you’ve impressed your boss with how deftly you handled that last minute request.
If you made your immersive project with Torch AR, share it with us by posting to social media with the tag #builtwithtorch – we’d love to see and share your augmented reality creations.


.gif)


