Your Inspirations Belong In AR
In previous blog posts we’ve demonstrated how Torch integrates with existing designer tools and workflows (specifically ones on Sketch and InVision), making it easy to design and prototype in 3D.
Today, I want to go a little earlier in the design process, to the point of inspiration. I’m writing to demonstrate how you can quickly move from a concept on paper -- UI wireframes, illustrations, notes -- into AR using Torch, in this case using Adobe Draw. No matter where inspiration strikes, as long as you’re able to draw it out, you will be able to put it directly into a Torch prototype.
If you are like most designers, you begin your product designs drawing wireframes on paper or whiteboards, reproduce them again digitally, then send them to your device for testing and, if you are working in AR, finally into 3D.
Or maybe, like many, especially in 3D, you skip wireframing altogether because of the friction, and instead run the risk that, after doing a bunch of work, your design doesn’t quite work.
The steps I am about to share will eliminate the headache of moving from concept on paper into 3D, dispensing with unnecessary work, and drastically shortening the path from idea on paper to AR.
From Paper to AR in a Few Short Steps
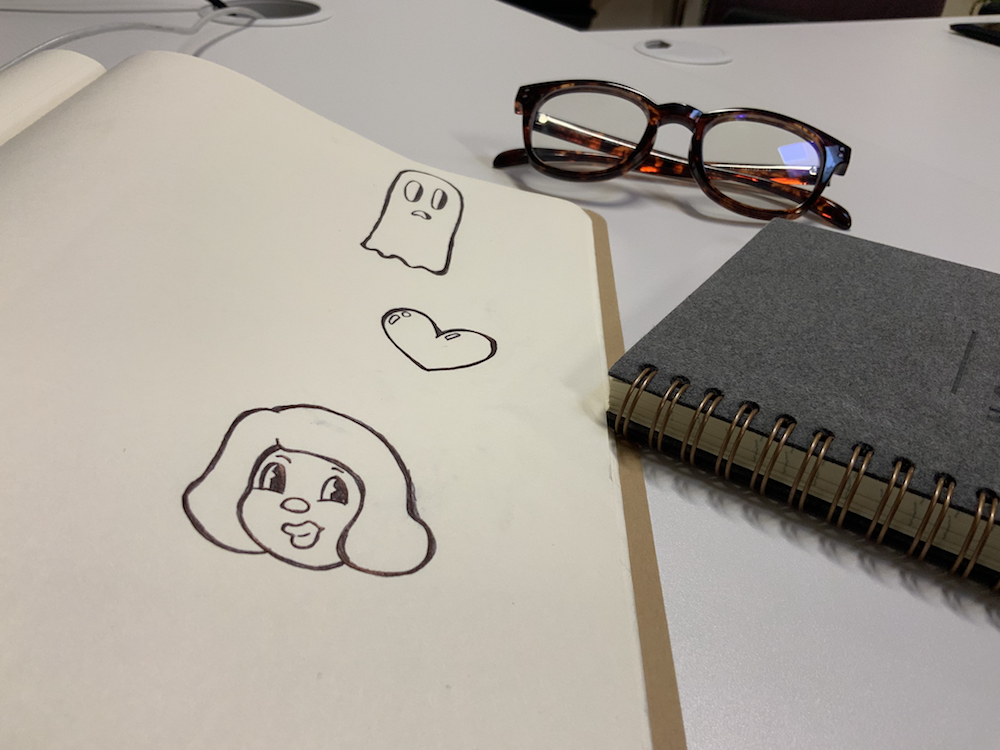
I draw on paper a lot - for my illustrations and to begin thinking about designs. If I want to capture those drawings, I use Adobe Draw with the Capture feature.
Specifically, I like how Draw makes it easy to turn my hand drawn work into vectors and then export them as pngs with tranparency, which is perfect for placement in the Torch app. I’ll also be showing you how to style those vectors in the Draw app, making them more impactful in AR.
I’ll share two examples: a serious one - capturing UI elements from a wireframing session for a 3D user interface - and a fun one - capturing quick drawings from my sketchbook in order to develop a storyboard.
Getting Started
You’ll need a few things to follow along.
- Download Torch AR and create an account.
- Download Adobe Illustrator Draw and create an account.
- Something with which to draw.
- Five minutes.
The Super-Detailed Step-by-Step
This process is really fast and intuitive once you’ve done it one time but for the sake of clarity I am going to spell out each step. But trust me, this is a breeze and the payoff is so worth it.
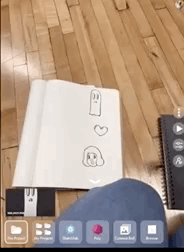
1. Choose something to capture or draw something - This is a pretty obvious first step. Tip: gaps in lines can make using the fill feature problematic and therefore make your drawing difficult to see in AR. Close any areas if possible,
2. Capture your drawing: once you have something, it is easy to capture it.
- Open the Adobe Draw app and start a new project. You will be prompted to choose a project size. Any size is fine. I usually use the square preset.
- Open the Shapes Menu and tap the triangle and circle icon. Add a new shape with the plus sign, This opens the Adobe Capture app from within Draw in order to turn your drawing into a vector. Note: you could do this process with just Adobe Capture, but your drawings wouldn’t be filled in.
- Adjust contrast to improve legibility - Use the slider to adjust the contrast to make sure your shape looks just right and is completely closed. If the drawing isn’t closed, it won’t allow you to fill.
- Clean up your vector - whatever you’ve captures is likely to have some extra artifacts. Take a moment to clean up your vector.
- Crop out the surrounding details using the crop option at the top.
- Use Erase to remove any artifacts or undesirable details that remain in the image after crop you can erase them
4. Save your work and add fill - Once your drawing looks ready, save it use Adobe Draw to add fill.
- Add to Canvas - Place the vector version of your drawing on the canvas you previous chose by holding it down for a moment.
- Add fill - Select a color from the palette and apply it to an area by long press in the area you’d like to fill.
- Remove background - Select the background layer and either delete it or make it invisible to create a transparent background. Note: even If the image is transparent, it’s still technically a square with a transparent fill, something you may have to allow for in your design.
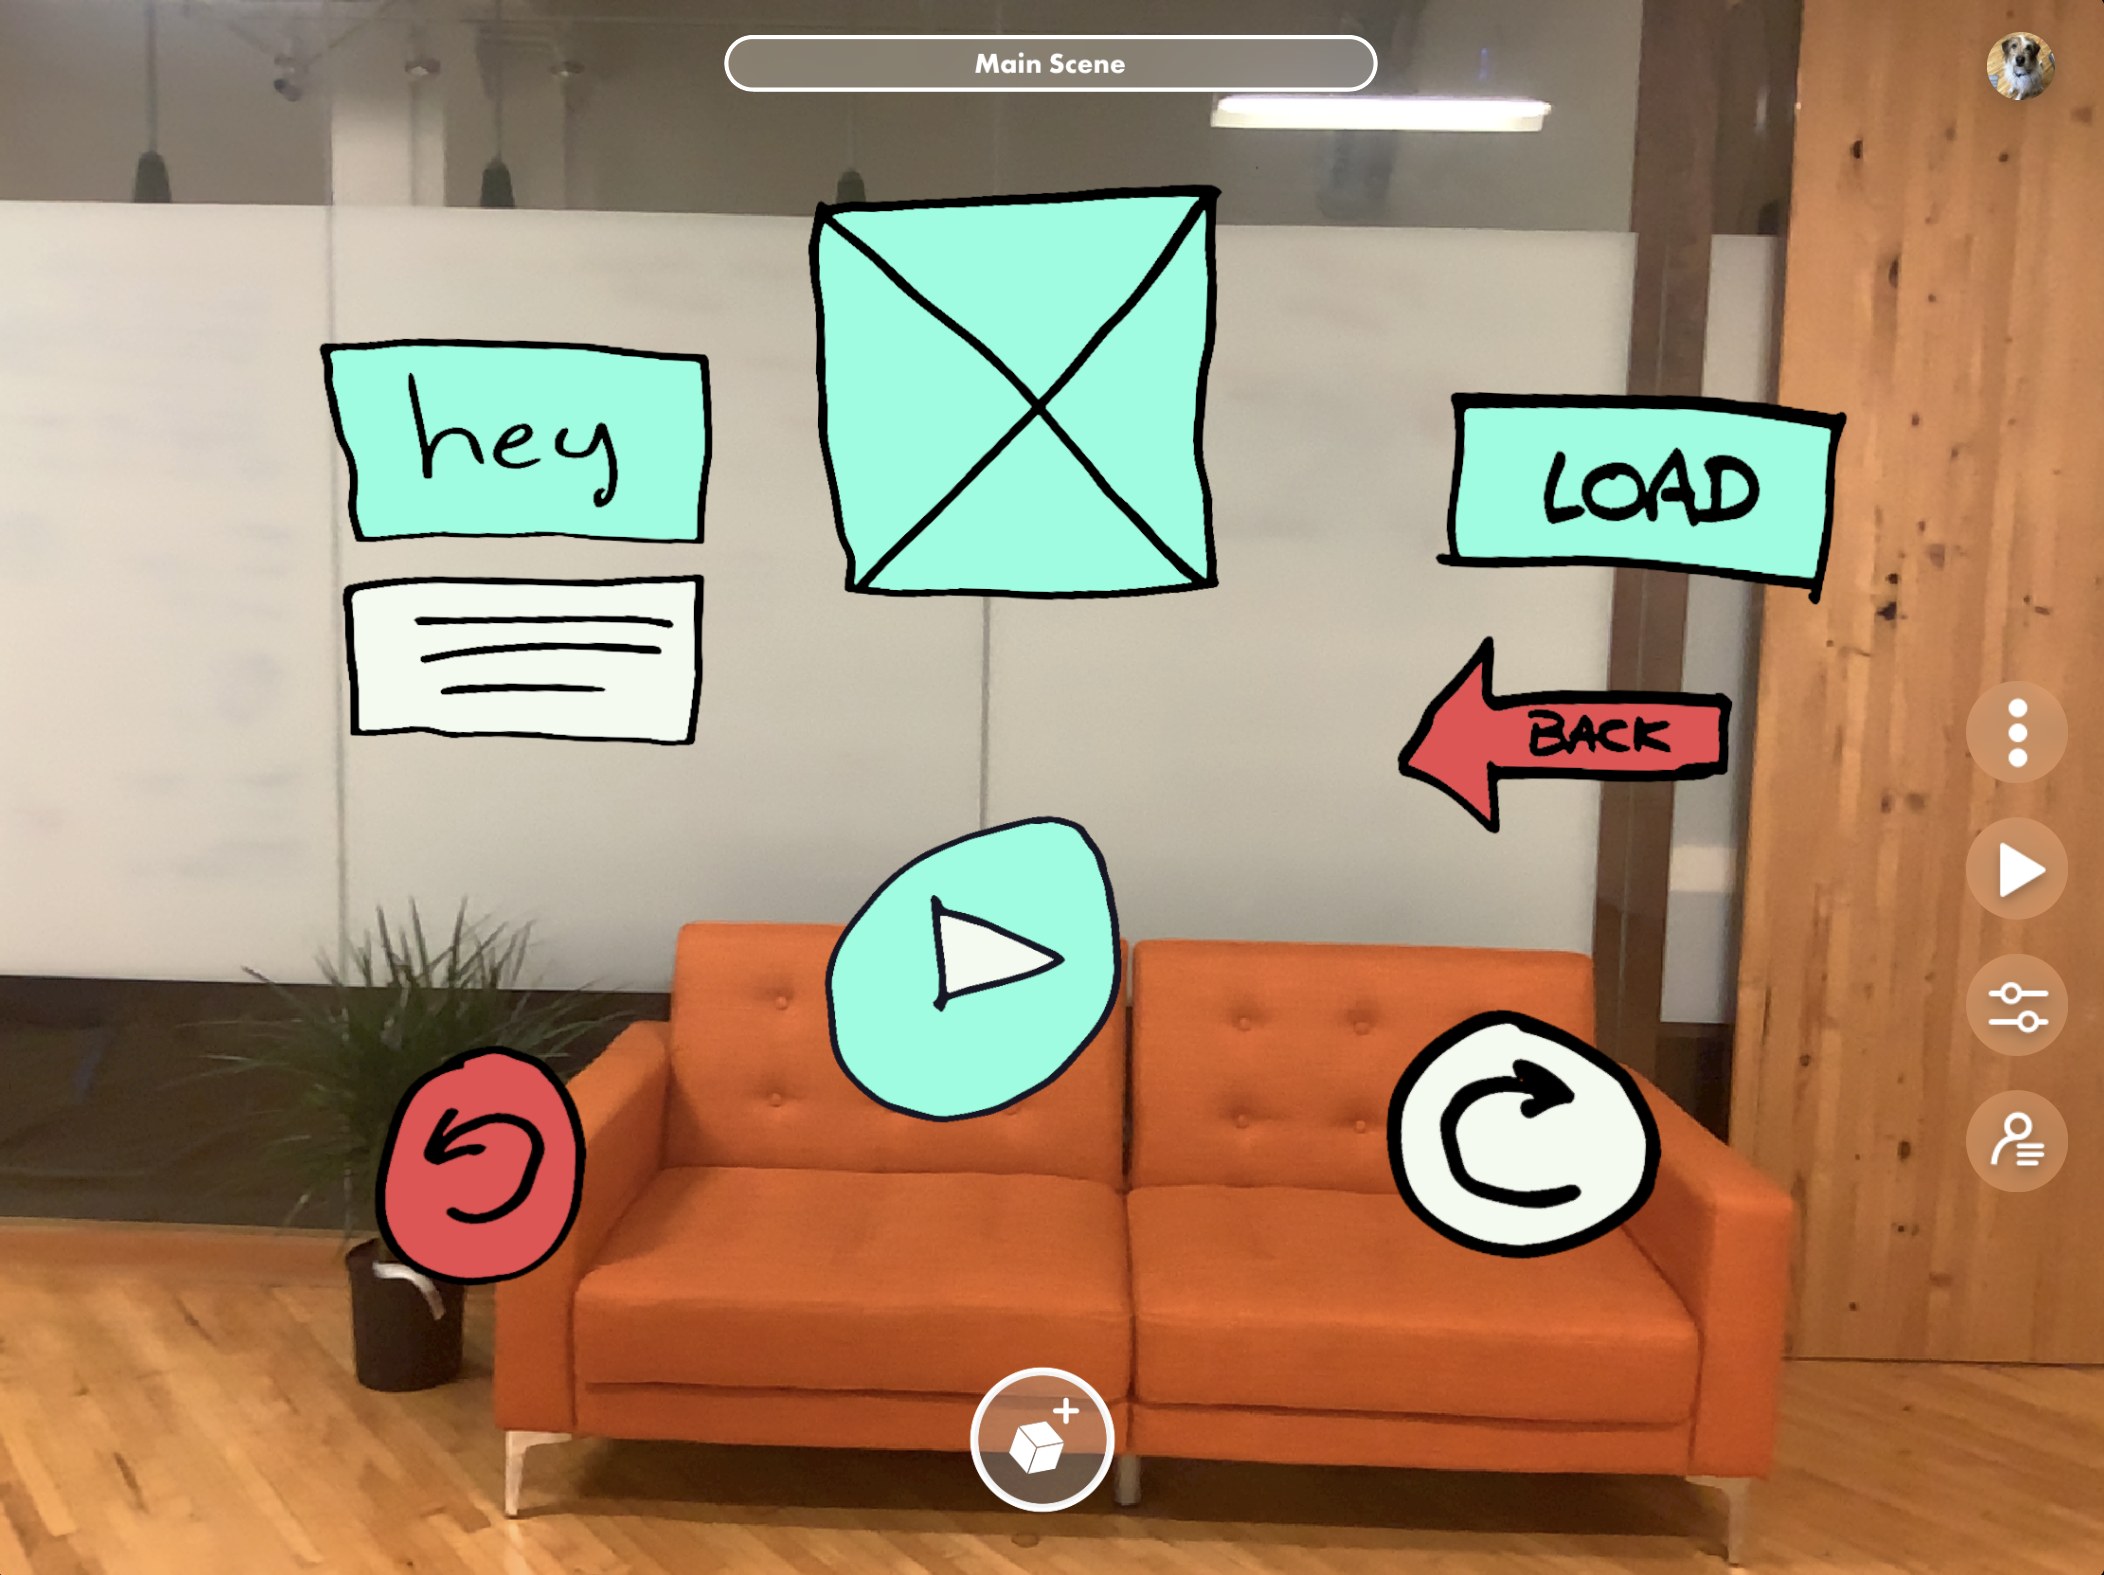
5. Add your drawings to 3D
- Save Your Drawings To Your iPhone or iPad - to your Camera Roll or save them to a connected cloud storage provider (Dropbox, Box, Drive, iCloud).
- Open the Object Drawer in Torch and tap either the Camera Roll or the Browse button, depending on where you saved the images.
- Drag and Drop - Place the assets in the scene you are designing via the Object Drawer.
Ta-da. You’re done!
You now have a direct path from the moment of inspiration directly into augmented reality that is straightforward and short.

Odds and Ends
- A General Pattern of Use - This process should work for any drawing or scanning app with an export feature and the option to set the PNG background to transparent. Use the tool with which you are most comfortable.
- Experiment - I found that it’s fun and useful to experiment with different line weights and writing instruments to get different textures and line qualities. The translation from an actual line into a vector and then into 3D creates a lot of unexpected and pleasing effects.
- Images Still in Adobe - It’s worth remembering these images will also be accessible where your Adobe assets are stored, ready to be used when you move forward with your design.
- Next Steps: Exploring Deeper Integrations - part of my job as a web developer at Torch (I also have a background in communications design) is to figure out how to make Torch fit into designer processes. That includes integration with Adobe Creative Cloud so your path from paper to AR is even shorter. Stay tuned!
That’s it for my first blog post.