


As you begin your first augmented reality (AR) projects in Torch AR, knowing the mechanics behind the key initial steps can speed your workflows and help you optimize your environment for AR design.
Join me on a tour of the first steps you’ll take with any AR project in Torch. We’ll review some common blockers in AR design and I’ll share my tips for starting a successful interactive augmented reality app with Torch.
After reading this blog post you’ll understand how lighting affects computer vision, the importance of surfaces in AR and how they are visualized, and how the World Anchor organizes your entire app.
Download Torch AR for free to follow these steps along with me on your iOS device.
1. Balance the lighting to help your camera “see”
Have you ever tried to take photo in a dark environment, like a candle-lit dinner or a spectacular full moon? It looked awesome in your head but your phone camera just couldn’t pull it off, right? The smartphone camera needs a lot more light to “see” things compared to the human eye—especially for mobile AR.
AR apps use “camera vision” to understand your surroundings and layer-in digital content. Lighting plays a key role in your AR experience and should be one of the first things you prepare in your AR design space.
The first time I tried Torch, I was in my living room in the dark, some November evening. Frustrated, I spent five minutes waving and waving my iPad trying to find at least one plane but no luck. A normal user would have quit but not me.
To fix this, I gathered all the lights from my apartment in a circle around my coffee table. From the outside, it may have looked like I was part of a ritual evocation. When I was finally able to bathe my workspace in bright even light, my camera found a surface plane to anchor to and I could begin my work.

Pro tip: Bright, even lighting is the first key to setting up a mobile AR design workspace.
- Find a well-lit space to begin your AR designs
- Diffused daylight works best
- Watch out for glare & hotspots that can confuse your phone’s vision
2. Add visual details to improve plane identification
From extensive user testing, we have observed that most users begin mobile AR design the same way they do most work—at their desks. While desks are a logical place to do design work, they can be problematic for AR design for a number of reasons—including clutter, limited mobility, and lighting.
Most desks are white or finished with reflective surfaces. Both of these scenarios can cause problems for AR Kit’s ability to locate and track the physical planes in your space.
Hotspots, glare, and underexposed areas can all wreak havoc on your spatial designs. If you’ve done all you can to control the lighting of your space and still have trouble finding planes, try adding additional detail and texture to assist your device’s camera vision.
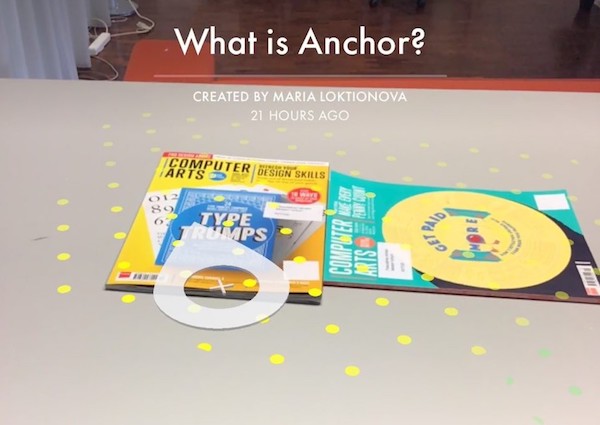
Pro tip: Add contrast and pattern to your workspace to improve tracking on solid or reflective surfaces. When I’m working with AR and I just can’t find a plane, I throw a book or a magazine on the desk to improve plane identification and tracking in my app as I move around.
3. Map & choose the right AR planes
Once your design space is ready, you must map and define the horizontal planes in the space. These spatial maps combined with your device’s position and motion data give Torch the power to display 3D content in your classroom, kitchen, anywhere, in a way that feels real, lifelike.
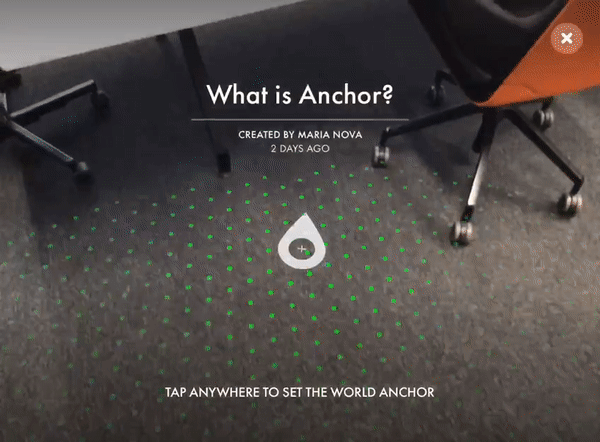
The first time you open Torch it will use your device’s camera vision to search for reference points and horizontal surfaces in the space around you. As AR Kit identifies a plane, you see a field of colored dots highlight the area.
As you continue to scan the area, Torch will highlight any additional horizontal surfaces it identifies. These planes will be highlighted with colors that help differentiate between layers. The closer the plane is to your device in AR space, the larger the dots will be. Additionally, the World Anchor icon grows in size as it discovers these closer planes.
Torch has enough information to recognize the textured feature but needs more information to map the smooth white table as a plane.
.gif)
Pro tip: Typically, the first plane Torch finds is the floor plane. Other planes will be displayed with additional cues about their positions. While these dot arrays are intended to clearly define planes, sometimes it may appear that the floor plane overlaps with the table plane.
During workshops I’ve facilitated, I’ve watched people confuse the floor plane with a table plane because there is no physical occlusion in most AR apps yet. Occlusion means hiding virtual objects behind physical objects as if they were actually occupying the same space.
Torch is working on a number of integrations and partnerships to add occlusion to our stack. You can subscribe to Torch Updates to learn about our newest features and timelines.
4. Why is it called the World Anchor? Why do I need one?
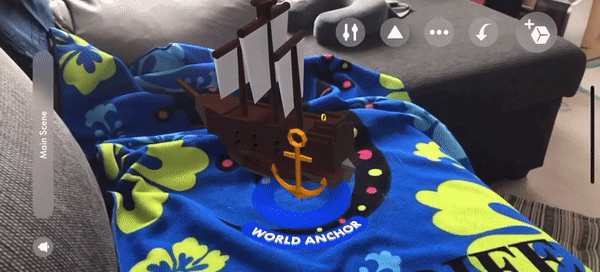
Every object in 3D space has a visual and spatial relationship with every other object in that space. In 3D apps, we describe these relationships by mapping them to the origin, or center, of our project space. No matter where you choose to place your World Anchor, it will always be the center of the coordinate system for your project.
Most 3D software utilize concepts similar to Torch’s World Anchor. In each program it has a different name: World Origin, Scene Origin, Session Origin, Absolute Center, World Anchor, Spatial Anchor, etc.. There is no unified terminology but each tool is using the same concept—the anchor has X-0, Y-0, Z-0 values in your design space.
Pro tip: Understanding the World Anchor is crucial for spatial planning of your AR project. You can think of anchor literally as an anchor that ties your AR project to that particular spot in space.
Get hands-on with these ideas
I've built a series of interactive AR onboarding apps that will help you visualize these concepts in an AR environment. Give them a try and get comfortable with spatial design before you begin working in the Torch AR design environment.
To try these tutorial apps:
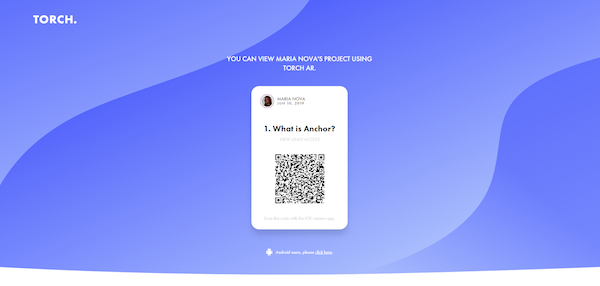
- Scan the code above with iOS camera app
- Allow your device to open the link in Torch, this opens the “What is Anchor” tutorial in a playable AR viewer
- Follow the prompts and links to the resources you need
- Enjoy! Don’t forget to Try all three apps
Share your experience with me on the Torch Friends Slack
About the author
Maria Nova is an XR Designer from Helsinki. She has worked with both virtual reality (VR) and augmented reality (AR) projects. Most recently her focus has been on mobile AR. Maria is an early Torch user and trainer, leading several user research sessions and AR prototyping workshops for designers and developers.
These early experiences inspire and inform her AR design internship with Torch, building resources that help creatives explore AR foundations while building proficiency using the Torch AR design environment. Find Maria on LinkedIn and Instagram


